How to Clean Tungsten Carbide Ring

How to Clean Tungsten Carbide Ring

How to Clean Tungsten Carbide Ring

Introduction

Today we will know how to Clean Tungsten Carbide Ring. Tungsten carbide rings are prized for their durability, scratch resistance, and everlasting shine. However, to keep them looking their best, regular cleaning is essential. In this guide, we’ll explore the best methods for cleaning tungsten carbide rings, ensuring they maintain their luster for years to come.

Understanding Tungsten Carbide Rings

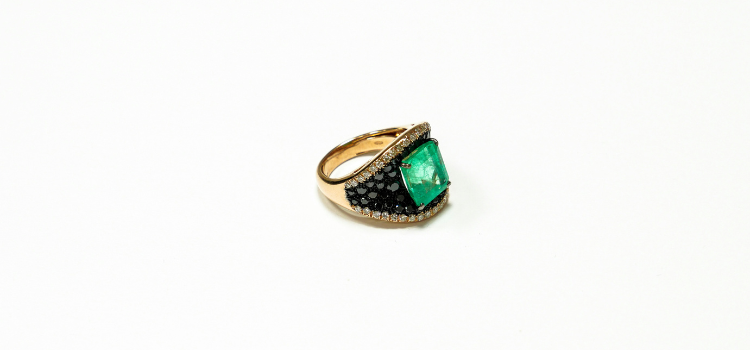
Tungsten carbide rings are made from a unique blend of tungsten and carbon atoms, resulting in an incredibly strong and durable material. These rings are popular for wedding bands and everyday jewelry due to their scratch-resistant nature and long-lasting shine.

Importance of Cleaning Tungsten Carbide Rings

Regular cleaning of tungsten carbide rings is of paramount importance to maintain their appearance and longevity. Here’s why:

Preserves Shine and Luster

Over time, tungsten carbide rings can accumulate dirt, oils, and debris from everyday wear. Regular cleaning helps to remove these particles, allowing the ring to retain its original shine and luster.

Prevents Buildup and Discoloration

Dirt and oils that collect on the surface of the ring can lead to unsightly buildup and discoloration. By cleaning your tungsten carbide ring regularly, you can prevent these issues and keep it looking like new.

Prevents Damage

Particles of dirt and debris can act as abrasives, causing tiny scratches on the surface of the ring. Over time, these scratches can accumulate and dull the appearance of the ring. Regular cleaning helps to remove these particles, preventing damage and preserving the ring’s beauty.

Maintains Hygiene

Cleaning your tungsten carbide ring regularly helps to remove bacteria and germs that can accumulate on its surface. This is particularly important for rings worn every day, as they come into contact with various surfaces and substances throughout the day.

Enhances Longevity

By taking care of your tungsten carbide ring through regular cleaning, you can extend its lifespan and ensure that it remains in excellent condition for years to come. This not only preserves its appearance but also protects your investment in the ring.

Safe Cleaning Methods

When it comes to cleaning tungsten carbide rings, it’s crucial to use safe and gentle methods to avoid damaging the ring’s surface. Here are some recommended safe cleaning methods:

Using Mild Soap and Water

One of the safest and most effective ways to clean a tungsten carbide ring is by using mild soap and water. Start by mixing a small amount of mild liquid soap with warm water in a bowl or basin. Then, dip a soft cloth or brush into the soapy water and gently scrub the surface of the ring. Avoid using excessive force, as this could potentially scratch the ring.

Soft Cloth or Brush

When cleaning your tungsten carbide ring, always use a soft cloth or brush with gentle bristles. Avoid using abrasive materials or harsh brushes that could scratch the ring’s surface. Microfiber cloths are particularly effective for gently removing dirt and debris without causing damage.

Avoiding Harsh Chemicals

Harsh chemicals, such as bleach, ammonia, or abrasive cleaners, should be avoided when cleaning tungsten carbide rings. These chemicals can damage the ring’s surface and may cause discoloration or corrosion. Stick to mild soap and water or specially formulated jewelry cleaners that are safe for use on tungsten carbide.

Avoiding Ultrasonic Cleaners

While ultrasonic cleaners are commonly used for cleaning jewelry, they are not recommended for tungsten carbide rings. The vibrations produced by ultrasonic cleaners can potentially damage the ring’s structure and lead to cracking or chipping. It’s best to stick to manual cleaning methods to ensure the safety of your tungsten carbide ring.

Avoiding Extreme Temperatures

When cleaning your tungsten carbide ring, avoid exposing it to extreme temperatures, such as hot water or direct sunlight. Rapid changes in temperature can cause the metal to expand or contract, potentially leading to damage or warping of the ring. Stick to lukewarm water and gentle cleaning methods to protect your ring from thermal shock.

Avoiding Harsh Chemicals

Harsh chemicals, such as bleach or ammonia-based cleaners, should be avoided when cleaning tungsten carbide rings. These chemicals can cause damage to the ring’s surface and may even alter its appearance.

Removing Stubborn Stains

For stubborn stains or buildup, consider soaking the ring in warm, soapy water for a few minutes before gently scrubbing with a soft-bristled brush. Avoid using abrasive materials that could scratch the ring.

Preventive Maintenance

To keep your tungsten carbide ring looking its best, consider removing it before engaging in activities that could cause damage, such as heavy lifting or contact sports. Additionally, regularly clean your ring to prevent buildup and maintain its shine.

Common Mistakes to Avoid

One common mistake when cleaning tungsten carbide rings is using abrasive materials or harsh chemicals, which can damage the surface. Additionally, avoid exposing your ring to extreme temperatures or sudden impacts, as this can cause it to crack or chip.

Long-Term Care

Taking care of your tungsten carbide ring goes beyond just regular cleaning. Here are some long-term care tips to ensure its longevity and beauty:

Avoid Harsh Conditions

While tungsten carbide is highly durable, it’s best to avoid subjecting your ring to harsh conditions that could potentially damage it. Remove your ring before engaging in activities such as heavy lifting, gardening, or sports to prevent scratches, dents, or other forms of damage.

Store Properly

When you’re not wearing your tungsten carbide ring, store it properly to prevent it from getting scratched or damaged. Consider using a soft cloth or jewelry box with individual compartments to keep your ring safe and protected.

Regular Inspection

Periodically inspect your tungsten carbide ring for any signs of damage, such as scratches, chips, or loose stones. If you notice any issues, take your ring to a professional jeweler for repair as soon as possible to prevent further damage.

Avoid Harsh Chemicals

Avoid exposing your tungsten carbide ring to harsh chemicals such as bleach, ammonia, or chlorine, as these can cause damage or discoloration. Remove your ring before swimming in chlorinated pools or using household cleaners to protect its finish.

Professional Maintenance

Consider taking your tungsten carbide ring to a professional jeweler for periodic maintenance and inspection. They can clean and polish your ring to restore its shine and luster, as well as check for any potential issues that may need addressing.

Avoid Resizing

Unlike traditional metal rings, tungsten carbide rings cannot be resized due to their hardness and durability. Make sure you know your ring size before purchasing to avoid any resizing issues in the future.

Handle with Care

Handle your tungsten carbide ring with care to prevent accidental drops or impacts that could cause damage. When taking it off or putting it on, hold it securely and avoid knocking it against hard surfaces.

Consulting a Professional

If your tungsten carbide ring requires more than routine cleaning, consider consulting a professional jeweler for assistance. They have the expertise and tools necessary to safely clean and restore your ring’s appearance.

Alternative Cleaning Methods

In addition to traditional cleaning methods, there are alternative techniques for cleaning tungsten carbide rings, such as ultrasonic cleaners or steam cleaners. However, exercise caution and ensure these methods are safe for your specific ring.

Eco-Friendly Cleaning Solutions

For those concerned about the environment, there are eco-friendly cleaning solutions available that are safe for tungsten carbide rings. Look for products labeled as environmentally friendly or consider making your own cleaning solution using natural ingredients.

DIY Cleaning Solutions

Simple DIY cleaning solutions can be effective for removing dirt and debris from tungsten carbide rings. For example, a mixture of vinegar and water can help dissolve stubborn buildup, while baking soda can act as a gentle abrasive to polish the ring’s surface.

Conclusion

Proper cleaning and maintenance are essential for preserving the beauty and longevity of tungsten carbide rings. By following these tips and techniques, you can keep your ring looking its best for years to come.

FAQ

Can I use toothpaste to clean my tungsten carbide ring?

Toothpaste can be abrasive and may scratch the surface of your ring. It’s best to stick to mild soap and water for cleaning.

How often should I clean my tungsten carbide ring?

Aim to clean your ring every few weeks to remove dirt and oils that can dull its appearance.

Can I wear my tungsten carbide ring in the shower?

While tungsten carbide is highly durable, it’s best to remove your ring before showering to prevent soap scum buildup.

Will my tungsten carbide ring tarnish over time?

Tungsten carbide is resistant to tarnishing, but regular cleaning will help maintain its shine.

Is it safe to use ultrasonic cleaners on tungsten carbide rings?

Ultrasonic cleaners can be effective for cleaning tungsten carbide rings, but be sure to follow the manufacturer’s instructions and avoid prolonged exposure.

Can I use a steam cleaner to clean my tungsten carbide ring?

While steam cleaners can be effective for cleaning some jewelry, they may not be suitable for tungsten carbide rings. It’s best to consult with a professional jeweler before using a steam cleaner on your ring.

How do I remove scratches from my tungsten carbide ring?

While tungsten carbide is highly scratch-resistant, deep scratches may require professional polishing to remove. Avoid using abrasive materials or harsh chemicals that could further damage the ring.

Can I clean my tungsten carbide ring with vinegar?

While vinegar can be effective for cleaning some types of jewelry, it’s not recommended for tungsten carbide rings as it may not be gentle enough. Stick to mild soap and water for best results.

Can I use a jewelry polishing cloth on my tungsten carbide ring?

Jewelry polishing cloths are generally safe for use on tungsten carbide rings, but be sure to use a gentle touch to avoid scratching the surface. Avoid using abrasive polishing compounds or cloths.

How should I dry my tungsten carbide ring after cleaning?

After cleaning your tungsten carbide ring, gently pat it dry with a soft, lint-free cloth to avoid water spots. Avoid using heat to dry the ring, as sudden temperature changes can potentially damage it.

How to Clean Tungsten Carbide Ring Read More »

how to store sweatshirts

How to store sweatshirts

how to store sweatshirts

Introduction

Hey there, sweatshirt enthusiasts! If you’re anything like properly Store sweatshirts, you probably have a soft spot for those comfy, go-to hoodies and crewnecks that make you feel at home wherever you go. But let’s be real – without the right storage game, those cozy companions might lose their charm over time for Store sweatshirts.

So, welcome to our guide on the art of Store sweatshirts – where we spill the beans on how to keep your favorite threads in tip-top shape. We get it; sweatshirts are more than just clothes. They’re the worn-in, familiar pieces that tag along on lazy Sundays or chilly outdoor escapades. But, if you’ve ever faced the heartbreak of faded colors or a hoodie that lost its shape, it’s time to level up your storage skills.

No worries, though! We’ve got your back with this all-inclusive guide. We’re talking cleaning hacks, clever storage ideas, and insider tips to preserve those specialty fabrics. Whether you’re a sweatshirt aficionado or just want your hoodies to stand the test of time, we’ve got something for everyone.

So, get ready to transform your Store sweatshirts routine from basic to brilliant. Join us as we spill the secrets on how to give your favorite cozy companions the VIP treatment they deserve. From preventing wrinkles to keeping moths at bay, we’re here to make sure your sweatshirts stay as snug as the day you first fell in love with them. Let’s dive right in!

The Importance of Properly Store sweatshirts

Sweaters are like old friends – warm, reliable, and there when you need them. But let’s be honest, keeping them cozy requires a bit of effort beyond just tossing them around. In this chat about why proper sweater storage is a big deal, we’re spilling the beans on the secrets to keeping those knits in top-notch shape.

Looking Good, Feeling Good:

Imagine grabbing your go-to sweater only to find it looking like it went through a blender. No one wants that! Proper storage is not just about appearances; it’s about keeping that softness and coziness intact. We’ll dig into the nitty-gritty of folding vs. hanging and how it impacts the way your sweaters feel and look over time.

Seasonal Vibes:

Sweater storage isn’t a one-size-fits-all situation, especially with the seasons doing their thing. We’ll talk about the importance of organizing your sweaters based on the weather, so your lightweight ones are at your fingertips in spring, and the chunky knits are ready for action when winter rolls in.

The Moth Dilemma:

Moths are like the party crashers of sweater storage. We’ll chat about how to keep those pests at bay and spill some tea on natural and chemical tricks to protect your knits from becoming their midnight snack.

The Right Atmosphere:

Your sweater’s environment is key to its survival. We’ll navigate through the do’s and don’ts, from avoiding dampness that leads to funky smells to steering clear of dryness that can turn your knits into crispy critters.

Storage for the Long Haul:

For those sweaters that take a backseat more often than not, we’ve got tips for long-term care. Learn how to give them a little TLC during hibernation so they come out looking fresh and ready to roll.

Cleaning and Maintenance for Store sweatshirts

Sweatshirts, the unsung heroes of comfort, deserve a little extra pampering to stay as snug as the first day you wore them. Let’s dive into a simple guide that’ll have your sweatshirts looking and feeling brand new, ready to tackle whatever you throw their way.

1. Quick Once-Over:

Before the wash party begins, give your sweatshirt a quick check. Look out for loose threads, any sneaky stains, or forgotten treasures in the pockets. A little pre-wash attention goes a long way.

2. Material Matters:

Not all fabrics are created equal. Take a sec to separate your sweatshirts by material – cotton, fleece, wool, you name it. This way, each one gets the VIP treatment it deserves during the cleaning process.

3. Into the Wash We Go:

Machine Wash:

Follow the care label for the lowdown.

Cold water is the cool choice to keep colors popping and prevent any unexpected shrinking.

Flip those sweatshirts inside out to protect prints or cool embroidery.

Hand Wash:

Fill up a basin with cold water and some gentle detergent.

Let your sweatshirt soak in the suds for 10-15 minutes.

Rinse it out thoroughly, giving it some gentle love to keep its shape intact.

4. Drying 101:

Air Dry:

Lay your sweatshirt flat on a dry towel.

Give it a little reshaping to keep that original form.

Let it air dry like a champ to avoid any unwanted shrinkage.

Machine Dry:

If you’re using the machine, keep it on low heat.

Rescue your sweatshirt promptly to dodge those pesky wrinkles.

5. To Fold or To Hang? That Is the Question:

Consider the material and your closet space when deciding. Folding is usually the gentler option, but if hanging suits your vibe, go for it!

6. Stain Emergency Protocol:

Got a stain? No sweat. Tackle it ASAP with a gentle stain remover or a mix of mild detergent and water. Always play it safe by testing on a hidden spot first.

7. In-Between Wash Perks:

Keep things smelling fresh between washes with fabric sprays or just let your sweatshirt chill in the fresh air for a bit.

How to Store sweatshirts:

Sweaters, our ultimate snuggle buddies, need a little R&R when they’re not out keeping us warm. In this down-to-earth guide, we’re letting you in on the secrets to storing your sweaters like a pro, so they stay soft, shapely, and ready to cozy up whenever you need them.

1. Fresh and Clean Start:

Let’s kick things off with a clean slate. Before you tuck them away, make sure your sweaters are all fresh and clean. This simple step helps avoid any funky smells or stubborn stains settling in while they’re in storage.

2. Know Your Fabrics:

Different fabrics, different needs. Sort your sweaters by material – wool, cashmere, cotton – you get the drift. It’s like giving each one a personalized spa day to keep them in top-notch condition.

3. Fold, Don’t Hang:

Sweaters prefer the fold life. Hanging can mess with their shoulders, leading to that awkward stretched-out look. Neatly folded sweaters keep their shape and avoid those annoying hanger bumps.

4. Embrace Sweater Storage Bags:

Give your sweaters their own cozy nook with breathable storage bags. It shields them from dust and lets the fabric breathe, steering clear of any musty odors or surprise mildew parties.

5. Moth-Be-Gone with Cedar:

Moths love a good sweater buffet. Introduce cedar blocks or sachets to your sweater storage crew – a natural moth repellent that also leaves a delightful aroma behind.

6. Say No to Overcrowding:

Resist the urge to play sweater Tetris. Overcrowding leads to wrinkles, weird shapes, and unnecessary friction. Let your sweaters breathe a bit; they’ll thank you later.

7. Keep it Cool and Dry:

Sweaters are chill beings, so store them in a cool, dry spot. Avoid damp corners (mildew alert!) and overly dry spaces that can make your fibers a bit too crispy.

8. Mix Things Up:

Give all your sweaters a chance to shine. Rotate them regularly between storage and your everyday wardrobe. It keeps the love evenly distributed, preventing some sweaters from feeling neglected.

9. Quick Freshen Up:

Before you slip into a stored sweater, give it a little shake and some fresh air. It’s the equivalent of a good morning stretch for your favorite knit.

Proper Folding Techniques For Store sweatshirts:

Folding clothes may seem like a mundane task, but when done right, it can transform your wardrobe into a neatly organized oasis. In this guide, we’ll delve into the world of proper folding techniques, ensuring that your clothes not only look sharp but also stay wrinkle-free and ready for action.

1. The Classic Fold:

Ideal for: T-shirts, casual shirts, and lightweight sweaters.

Lay the garment flat on a clean surface.

Fold one side (about one-third) toward the center.

Fold the opposite side to meet the first fold, creating a neat rectangle.

If necessary, fold again for a space-saving option.

2. The KonMari Method:

Ideal for: All types of clothing, especially those that spark joy.

Lay the garment flat, and fold it in half lengthwise.

Fold the sleeves or excess fabric inward.

Fold in half again or thirds, depending on the size and your storage space.

3. The Military Roll:

Ideal for: Packing efficiently or saving drawer space.

Lay the garment flat.

Fold one side and sleeve inward, creating a straight edge.

Roll the garment tightly from the bottom to the top.

The result is a compact roll that minimizes wrinkles.

4. The Square Fold:

Ideal for: Dress shirts, button-ups, and structured garments.

Lay the shirt flat with sleeves extended.

Fold one sleeve across the back, creating a 90-degree angle.

The bottom up, creating a neat rectangle.

5. The Flip-and-Fold:

Ideal for: Sweaters, hoodies, and thicker fabrics.

Lay the garment face down.

Fold each sleeve toward the center.

Fold the bottom up, covering the sleeves.

Flip the garment over for a clean finish.

6. The Socks and Underwear Fold:

Ideal for: Small items like socks and underwear.

Fold socks in half and then tuck one into the other.

For underwear, fold in half horizontally and then vertically, creating a compact square.

Tips for Proper Folding:

Always fold clothes when they are clean and dry to prevent wrinkles.

Use flat, clean surfaces to avoid transferring dirt to your clothes.

Group similar items together for efficient organization.

Store folded clothes vertically to easily see and access each item.

Hangers vs. Folding For Store sweatshirts:

Choosing how to store your beloved sweatshirts is a real wardrobe dilemma. Are they better off hanging like VIPs or chilling in a neat fold on a shelf? Let’s dive into the cozy conundrum and figure out the best way to treat your sweatshirt squad.

Hanging:

Pros:

Hanging: Displays your sweatshirts like a fashionista’s dream, making it easy to spot your favorite cozy pick.

No Wrinkle Drama:

Hanging: Keeps your sweatshirts wrinkle-free and ready to roll, especially if you’ve got some snazzy prints or embroidery.

Space Saver Extraordinaire:

Hanging: Maximizes vertical space in your closet, leaving room for even more snuggly additions.

Quick-Fire Selection:

Hanging: Grab-and-go ease, no digging required. Your sweatshirts are on display, ready for their moment in the spotlight.

Cons:

Hangar Hurdles:

Hanging: Limited by the type of hanger and closet rod space. Not all sweatshirts play nice with hangers.

Occupies Closet Real Estate:

Hanging: Takes up some prime horizontal space in your closet, potentially limiting the number of sweatshirt pals you can squeeze in.

Folding:

Pros:

Cozy Nesting:

Folding: Creates a cozy little nest for your sweatshirts, especially if your closet has some shelf space.

Wrinkle-Worry-Free Zone:

Folding: While not on display, it minimizes wrinkles and maintains the soft, cuddly nature of your sweatshirts.

Budget-Friendly Setup:

Folding: No need for fancy hangers; a simple shelf or drawer can become the snug haven for your sweatshirt collection.

Accessible Stacking:

Folding: Easily stackable, allowing you to see the variety in your collection without the need for a sweatshirt fashion show.

Cons:

Hidden Gems Syndrome:

Folding: The bottom sweatshirts might get a bit shy, hiding behind the ones on top.

Unfolding Effort:

Folding: Requires a bit of unfolding action before you can see and pick the lucky sweatshirt for the day.

Finding Your Sweatshirt Bliss:

The showdown between hanging and folding for your sweatshirts is all about personal preference. Hanging if you’re all about the visual vibe, folding if you prefer the snug, organized look. Mix and match, or choose a side – either way, your sweatshirts are sure to appreciate the cozy treatment!

Organizing by Season (Store sweatshirts):

Hey there, sweatshirt aficionado! Ever thought about treating your beloved collection to a year-round adventure? Buckle up, because we’re about to embark on the ultimate sweatshirt organization journey based on the changing seasons. Let’s make your closet a cozy haven that evolves with the weather.

1. Spring Fling:

March to May

Ah, the sweet scent of spring! Start by decluttering your wardrobe from winter heavies. Introduce your lighter, breathable sweatshirts to the spotlight, maybe in some pastels or vibrant hues.

Keep those fresh, breezy picks front and center for those cool spring evenings – easy to grab and oh-so-ready for action.

2. Summer Lovin’:

June to August

Summer vibes are in the air! Time to swap out the thicker fabrics for breezy cotton and lightweight blends. Think bold colors and playful patterns to infuse some fun into your summer wardrobe.

Keep a couple of your lightweight favorites within arm’s reach, just in case the summer nights decide to get a bit chilly.

3. Autumn Embrace:

September to November

Fall magic is here! Retrieve your mediumweights in warm, earthy tones – the rusts, olives, and mustards. Cozy textures like fleece or brushed cotton become your best pals.

Strategically arrange them for easy access during those brisk fall strolls. Because who doesn’t love a well-placed, comfy layer?

4. Winter Wonderland:

December to February

Winter has its own charm! Bring out the big guns – your coziest, chunkiest sweatshirts. Embrace the darker shades, classic neutrals, and don’t forget those hoods and kangaroo pockets.

Keep your winter essentials front and center, ready to rescue you from the chill in style.

Tips for Your Cozy Odyssey:

Smart Storage:

Invest in breathable garment bags or storage containers. Your sweatshirts will thank you for the extra love.

Wear and Tear Check:

Before each seasonal swap, give your sweatshirts a quick once-over. Loose threads or fading? Time for some TLC.

Pre-Wear Refresh:

Give your sweatshirts a mini spa day before wearing them. A little shake or some fresh air works wonders.

Strategic Organization:

Keep the current season’s stars within easy reach. Your future self will appreciate the effort.

Out with the Old:

Use the seasonal shift to declutter. If a sweatshirt doesn’t spark joy or is showing signs of too much love, consider passing it on.

Avoiding Moths and Pests For Store sweatshirts

Nobody wants to open their closet to find unwanted guests munching on their favorite sweatshirts. Let’s chat about some down-to-earth ways to keep those pesky moths and critters at bay, ensuring your cozy collection stays as snug as ever.

1. Cleanliness First:

Before you tuck those sweatshirts away, give them a good once-over. Make sure they’re clean and clear of any crumbs or spills that might attract unwelcome visitors.

2. Gentle Laundering:

Treat your sweatshirts to a spa day before storage. Moths love body oils and food bits, so a thorough wash with a moth-repelling detergent is a solid start.*3. Dry Like a Boss:

Moisture is the enemy of cozy. Ensure your sweatshirts are bone-dry before stashing them away. No damp corners for moths and pests to call home.

4. Seal the Deal with Containers:

Invest in some sealed storage containers. Think of it as a force field against potential intruders. Clear containers are a bonus – you can spy on any sneaky critters trying to crash the comfy party.

5. Nature’s Repellents:

Get your hands on cedar blocks or lavender sachets – moths despise the scent. Toss them into your storage containers or hang them in the closet for a natural shield.

6. Keep Watch:

Stay vigilant. Regularly check your stored sweatshirts for any signs of unwanted guests or mischief. Catching a problem early on is the key to avoiding a full-on critter invasion.

7. Say No to Harsh Chemicals:

If you’re not a fan of chemical repellents, go natural. Sachets filled with dried mint or cloves can do the trick without the harsh stuff.

8. Vacuum Magic:

Consider vacuum-sealed bags for extra protection. Not only do they save space, but they also create a nearly airtight fortress against pesky invaders. Just be gentle with delicate fabrics.

9. Show Some Love:

Rotate your sweatshirt lineup. Give each piece a chance to shine regularly. It’s like a VIP party – everyone gets an invite, and no one feels left out.

10. Professional TLC:

For those special sweatshirts, think about professional cleaning before storage. The experts know how to pamper delicate threads and keep them critter-free.

DIY store sweatshirts Solutions

Let’s give your sweatshirts the storage they deserve with some easy, down-to-earth DIY solutions. No need for a toolbox – just a pinch of creativity and a sprinkle of enthusiasm to make your wardrobe a cozy haven.

1. Shelf Dividers for Neat Stacks:

What You Need: Cardboard, wrapping paper or fabric, glue.

How-To: Cut sturdy cardboard to shelf height, cover it in your favorite paper or fabric, and glue it in place. Enjoy tidy stacks of sweatshirts with no leaning towers.

2. Hanger Hacks for Extra Space:

What You Need: S-hooks, shower curtain rings, hangers.

How-To: Double your hanging space by using S-hooks or shower curtain rings. Loop them around your hangers and hang another hanger from each – more space without the hassle.

3. Floating Shelves for Easy Reach:

What You Need: Floating shelf brackets, screws, a wooden plank.

How-To: Install floating shelves at eye level for easy access. Screw in the brackets, mount the plank, and you’ve got a chic storage solution adding flair to your space.

4. Bungee Cord Wall Display:

What You Need: Bungee cords, hooks.

How-To: Create a cool wall display by stretching bungee cords horizontally between hooks. Clip your sweatshirts on for an ever-changing art piece – your own cozy gallery.

5. Ladder Rack Chic:

What You Need: Wooden ladder, paint or varnish (optional), hooks.

How-To: Clean up an old wooden ladder, add paint or varnish if you like, and attach hooks. Lean it against the wall for a ladder-style storage solution that’s effortlessly cool.

6. Pegboard Organizer Magic:

What You Need: Pegboard, hooks, paint (optional).

How-To: Mount a pegboard on the wall, paint it in your favorite color, and hang hooks. Showcase your sweatshirt collection like a personal boutique – easy to rearrange and admire.

7. Basket Brigade for Folded Bliss:

What You Need: Woven baskets, labels (optional).

How-To: Grab some stylish woven baskets, fold your sweatshirts neatly, and label for extra organization. Stack them in your closet or on shelves for a cozy, tucked-away vibe.

8. Tension Rods for Extra Hanging Space:

What You Need: Tension rods.

How-To: Place tension rods between shelves or inside your closet. Hang additional hangers for an instant boost in hanging space. No drills, no fuss – just more room for your sweatshirt crew.

Frequently Asked Questions (FAQ) About store sweatshirts

Q: How do I keep my sweatshirts wrinkle-free?

A: Hang them on padded or wooden hangers for a crease-free look. If you’re a folder, use proper folding techniques to minimize wrinkles.

Q: Any recommendations for hangers?

A: Padded or wooden hangers are your sweatshirts’ best friends. Wire hangers can stretch them out, so it’s best to avoid those.

Q: Can I use vacuum-sealed bags for my sweatshirts?

A: Sure, for short-term storage. They save space, but don’t rely on them for extended periods as they might squash your sweatshirts.

Q: How do I keep moths away from my sweatshirts?

A: Keep your storage area clean, and throw in some cedar blocks or lavender sachets. Regular checks for moths won’t hurt either.

Q: Closet or dresser drawers for sweatshirt storage?

A: It’s your call. Both work, but drawers can keep your sweatshirts dust-free.

Q: Are garment bags a good idea for sweatshirt storage?

A: Absolutely! Breathable garment bags shield against dust and pests. Just make sure they let some air in.

Q: Is it really necessary to wash sweatshirts before storing them?

A: Highly recommended. Clean them up to remove any oils, stains, or crumbs that might attract unwanted visitors.

Q: How often should I switch up my sweatshirt collection for seasons?

A: Think every three to six months, depending on the weather in your neck of the woods.

Q: Can different fabric types hang out together?

A: Generally yes, but watch out for bleeding colors. Also, avoid tossing textured fabrics with more delicate ones.

Q: How do I avoid that musty smell in stored sweatshirts?

A: Ensure your sweatshirts are bone-dry before storing. Throw in some silica gel packets to absorb any lurking moisture.

How to store sweatshirts Read More »

What is 78 leggings

What is 7/8 leggings

Introduction

What is 78 leggings

Hey there! Ever heard of 7/8 leggings and wondered what the buzz is all about? Well, you’re not alone! These leggings are creating quite a stir in the fashion and activewear scene. So, what exactly are they?

Imagine leggings that aren’t full-length but aren’t capris either – that’s where the 7/8 leggings come in. They’re like the Goldilocks of leggings, hitting that perfect length between full and capri, making them a unique and practical choice for a variety of occasions.

In this blog, we’re diving into the world of 7/8 leggings. We’ll chat about what makes them stand out, why people love them, and how they’ve become a staple in both fashion and fitness circles. Whether you’re a fashionista, a fitness freak, or just curious, come along as we explore the charm and versatility of 7/8 leggings – your new wardrobe favorite might just be waiting for you!

Definition of 7/8 Leggings

7/8 leggings are basically the Goldilocks of the leggings world. They’re not too long like full-length ones, and they’re not too short like capris. Instead, they hit that sweet spot, covering about seven-eighths of your leg.

So, picture leggings that stop just above your ankles or maybe right below your calf muscles. That’s the 7/8 style! What’s cool about them is that they give you that comfy legging feel but with a bit of extra style. It’s like they found the perfect balance between looking good and being practical.

These leggings are awesome for all kinds of things – whether you’re rocking a casual look or getting active. And because they’re not too long or too short, they’re pretty versatile for different seasons and occasions. So, if you’re after leggings that are both trendy and comfy, 7/8 leggings might just be your new go-to!

How  long are 7 8 leggings?

7/8 leggings get their name from covering about seven-eighths of your leg. Picture leggings that fall somewhere between full-length ones and capris. They typically stop just above your ankles or go a bit below your calf muscles. It’s that sweet spot that gives them a unique look and makes them perfect for various activities and occasions. So, in a nutshell, they’re not too long, not too short

Features of 7/8 Leggings

Length and Fit:

Intermediate Length:

7/8 leggings derive their name from their length, covering approximately seven-eighths of the leg.

Typically, they extend just above the ankles or slightly below the calf muscles.

Versatility:

Strikes a balance between full-length leggings and capris, offering a versatile style suitable for various occasions.

Material and Comfort:

Fabric Choices:

Crafted from a variety of materials, including spandex, polyester, and nylon.

The blend of materials often provides a comfortable stretch while maintaining durability.

Breathability:

Many 7/8 leggings feature breathable fabrics, making them suitable for both casual wear and workouts.

Versatility and Styling:

Fashionable Aesthetic:

The intermediate length lends a trendy and modern aesthetic to the overall look.

Ideal for those who want to add a stylish touch to their activewear or casual outfits.

Styling Options:

Offers versatility in styling, allowing for various outfit combinations, from athleisure looks to more dressed-up ensembles.

Fitness and Performance:

Active Wear:

Suited for a range of physical activities, including yoga, running, and gym workouts.

The length is practical for movement while providing coverage during exercises.

Moisture-Wicking:

Many 7/8 leggings come with moisture-wicking properties, keeping the wearer dry and comfortable during intense workouts.

Seasonal Adaptability:

Versatile enough for year-round wear, easily transitioning from warmer to cooler seasons.

Can be layered for added warmth during colder weather.

Prints and Patterns:

Available in a wide array of prints and patterns, providing options for those who want to express their style.

are 7 8 leggings and ankle-length leggings the same?

7/8 Leggings:

leggings that hit that sweet spot between full-length and capris. They’re called 7/8 leggings because they cover about seven-eighths of your leg. Usually, they stop just above your ankles or go a bit below your calf muscles. These are awesome for when you want that comfy legging vibe but with a touch of style. They’re perfect for anything from casual hangouts to workout sessions.

Ankle-Length Leggings:

Now, ankle-length leggings are more straightforward. They go all the way down, covering your legs from the waist to your ankles. It’s the classic, no-frills choice that works with pretty much any outfit.

So, What’s the Difference?

The big thing here is the length. 7/8 leggings give you that in-between look, not too long and not too short. They’re all about being versatile and trendy. On the flip side, ankle-length leggings are the OGs, providing full leg coverage and serving up that timeless style.

7 8 leggings vs full length leggings

let’s chat about leggings, those comfy essentials that find their way into our wardrobes. Today, we’re shining a spotlight on two favorites – 7/8 leggings and their classic counterpart, full-length leggings. They may seem similar at first glance, but each has its own vibe and perks.

Ever wondered which one’s the right fit for your style? We’re breaking down the key differences to help you decide. Are you ready to explore the world of leggings? Let’s dive in!

Comparison: 7/8 Leggings vs. Full-Length Leggings

Feature7/8 LeggingsFull-Length Leggings
LengthAbout seven-eighths of the legFull length, covering everything
FitStops just above ankles or below the calfExtends from the waist to the ankles
VersatilityPerfect for various occasionsA classic for everyday wear
Fashion AppealTrendy and modern aestheticTimeless, easily dressed up or down
Styling OptionsMix and match for versatile looksTypically casual or for workouts
Seasonal AdaptabilityWorks all year, layer for extra warmthCooler seasons may call for full length
PerformanceIdeal for active wear and exercisesComfy for low-impact activities
Brand VarietyLots of brands, unique designsDiverse styles and brands available
Care and MaintenanceEasy to care for, durableStandard care, durability varies
Customer PreferenceLoved for a modern, stylish vibeA timeless choice appreciated for simplicity

7 8 leggings vs capri leggings

let’s talk leggings! We all love the comfort they bring to our wardrobes. Today, we’re diving into the world of two legging styles that often share the spotlight – 7/8 leggings and capri leggings. These two bring their own charm to the table, each with a unique vibe. Let’s break it down and see which one might become your new favorite.

7/8 Leggings vs. Capri Leggings

Feature7/8 LeggingsCapri Leggings
LengthAbout seven-eighths of the legUsually between knee and ankle
FitStops just above ankles or below the calfEnds somewhere between knee and ankle
VersatilityGoes well with various occasionsPerfect for casual and laid-back vibes
Fashion AppealTrendy and modern aestheticSporty and casual, ideal for warm weather
Styling OptionsMix and match for versatile looksBest for easygoing, casual outfits
Seasonal AdaptabilityWorks year-round, layer for extra warmthIdeal for warmer seasons due to shorter length
PerformanceGood for active wear and exercisesSuitable for low-impact activities
PurposeBalances style and functionGreat for a relaxed, easygoing style
Brand VarietyVarious brands, often trendy designsCasual and athletic brands
Care and MaintenanceEasy to care for, durableStandard care, durability varies
Customer PreferenceLoved for a trendy, versatile lookPreferred for a chill, laid-back style

How to style yourself with 7 8 leggings like a pro

let’s talk about rocking those 7/8 leggings like a pro. Here’s your guide to effortlessly slay any occasion:

1. Show Off that Midriff:

Throw on a cute crop top or a fitted tank with your 7/8 leggings. It’s the perfect combo to highlight the leggings’ length and give you that trendy, athletic vibe.

2. Cozy Chic with Oversized Sweaters:

Pair your leggings with an oversized sweater or a comfy knit. It’s all about that casual-chic look, perfect for a relaxed day out or a chill weekend.

3. Long Jackets for Extra Sass:

Add a touch of sophistication with a long jacket or duster coat. Not only does it keep you warm, but it also brings that extra dash of style to your outfit.

4. Athleisure Magic:

Rock the athleisure trend by teaming your leggings with a stylish sports bra or activewear top. Finish the look with a pair of cool sneakers – you’re ready to own the gym and the streets!

5. Sneaker Love:

Speaking of sneakers, they’re your best buddies with 7/8 leggings. Whether it’s classic white kicks for a laid-back look or statement sneakers for some flair, they’re the perfect match.

6. Belt it Up for Elegance:

Bring in some polish by adding a belt to your 7/8 leggings. It not only defines your waist but also adds a touch of sophistication, making it versatile for various occasions.

7. Chill Vibes with Graphic Tees:

Keep it casual with a graphic tee paired with your leggings. Tuck it in for a neat look or knot it for that effortless coolness.

8. Heels for Unexpected Glam:

Surprise everyone by rocking your 7/8 leggings with heels. Stilettos, block heels, or ankle boots – they all elevate your casual leggings into a chic statement.

9. Play with Patterns:

Don’t be afraid to mix and match patterns. Whether it’s a patterned top or printed leggings, experimenting with patterns can create a bold and stylish look.

10. Accessorize Like a Pro:

Complete your 7/8 leggings look with killer accessories. Think statement earrings, a classy watch, or a chic hat – these little details make a big difference.

Frequently Asked Questions (FAQ) About 7/8 Leggings

What exactly are 7/8 leggings?

7/8 leggings are those cool in-betweeners – not full-length, not capris. They cover about seven-eighths of your leg, usually stopping just above the ankles or a bit below the calf muscles.

How do I know what size to get?

Check the sizing chart from the brand. Generally, go for a size that matches your waist and hips. And keep in mind the stretch factor for that comfy fit.

Are 7/8 leggings for everyone?

Yep! They’re pretty versatile, catering to different body types. Just find your right size, and you’re good to go.

Can I work out in 7/8 leggings?

Absolutely! They’re perfect for workouts – stretchy and comfy. Look for the moisture-wicking kind if you’re planning a sweat session.

How should I style these leggings?

Mix it up! Crop tops, oversized sweaters, long jackets – they all work. And don’t forget to play with different shoes, like sneakers or even heels.

Can I wear them in any weather?

Yep, 7/8 leggings are like all-season champs. Layer up for winter or keep it breezy in summer. They got you covered.

Formal occasions in 7/8 leggings – yay or nay?

While they’re more casual, you can totally glam them up for semi-formal events. Think heels, a snazzy top, and some bling.

How do I keep them in good shape?

Easy peasy. Check the care tag, but usually, cold wash and hang to dry. Skip the fabric softeners to keep that stretch intact.

Different materials – any recommendations?

You bet! They come in spandex, polyester, nylon – pick what floats your boat. Each material brings its own vibe.

Casual hangouts in 7/8 leggings – yay or nay?

Absolutely! They’re your casual besties. Throw on a comfy tee, some sneakers, maybe some accessories, and you’re good to go!

What is 7/8 leggings Read More »

How to avoid camel toeing in leggings

How to avoid camel toeing in leggings

How to avoid camel toeing in leggings

Introduction :

Hey there! Let’s talk about something we all love – leggings! How to avoid camel toeing in leggings They’re comfy, cool, and go with everything, right? But sometimes, there’s this not-so-cool thing called camel toe that can sneak in and cramp our style. Don’t worry, though – we’re here to make sure your leggings stay fab without any fashion hiccups.

In this chat, we’ll keep it simple and spill the beans on how to pick the right size, choose the best materials, and make sure your leggings are designed to keep camel toe away. Whether you’re a gym lover, a casual leggings fan, or just someone who likes feeling good, we’ve got your back.

Ready to rock your leggings without a worry in the world? Let’s dive in and make sure every step is as comfy and stylish as can be!

What Is “Camel Toe”?

Alright, let’s get real – ever noticed that kinda awkward outline down there when you’re rocking tight pants or leggings? Yeah, that’s what we call “camel toe.” Weird name, right?

Basically, it’s when your clothes, especially the snug ones, decide to show off more than you’d like in the crotch area. Picture it like a little fold or indentation, and voila – camel toe!

No biggie, it’s totally normal, but for some of us, it’s not the look we’re going for. So, let’s chat about what causes it and how to keep our outfits looking smooth and comfy. Ready to tackle the camel toe mystery with me? Let’s go!

Why Shouldn’t You Be Embarrassed by the “Dreaded Camel Toe”? For avoid camel toeing in leggings

Alright, let’s talk straight – that whole “dreaded camel toe” thing? No need to sweat it. Seriously. It happens to everyone at some point, and it’s just a part of life.

We wear clothes, clothes fit differently on different days, and sometimes, well, you end up with a bit more attention down there than planned. But guess what? That’s okay! It’s natural, and it doesn’t say a thing about you.

Instead of feeling embarrassed, let’s remember we’re all in this together. Everybody’s got their quirks and wardrobe malfunctions. So, why stress about it? Life’s too short to let a tiny wardrobe hiccup ruin your day. Let’s keep it real, embrace the normal stuff, and move on without the unnecessary worries.

Camel Toe Can Have Downsides Besides the Appearance for avoid camel toeing in leggings

Let’s chat about camel toe – it’s not just a fashion faux pas; there’s more to it than meets the eye.

1. Comfort Counts:

Yeah, camel toe can mess with your comfort game. Ever had fabric bunching up where it shouldn’t? Not the best feeling, especially during workouts or long days.

2. Chafing Woes:

Tight clothes and camel toe can be a recipe for chafing. Ouch! No one wants irritated skin because of their leggings.

3. Confidence Crunch:

It’s not just about how it looks; dealing with camel toe can mess with your confidence. Feeling self-conscious is no one’s idea of a good time.

4. Social Hiccups:

Constantly adjusting your clothes to dodge camel toe? It can get awkward, drawing eyes when you’d rather keep things low-key.

6 Ways to Avoid Camel Toes in the First Place When Wearing Leggings

Alright, let’s talk about the real struggle – avoiding camel toes when you’re rocking those leggings. Here are six down-to-earth tips to help you sidestep the camel toe drama:

Get the Right Size:

Size matters, seriously! Go for leggings that hug you just right. If you’re constantly adjusting, they might be a tad too small.

Watch the Fabric:

Opt for leggings with a bit of stretch, like those spandex blends. Steer clear of super thin materials that spill all your secrets.

Gusseted Crotch FTW:

Look out for leggings with a gusseted crotch or flat seams. They give you more room and less bunching – a win against camel toe.

High-Rise for Coverage:

High-rise leggings can be your secret weapon. They offer more coverage in the crotch zone, keeping camel toe on the down-low.

Camel Toe Inserts Exist:

Yes, you heard it right! There are inserts to save the day. Throw them in for an extra layer of confidence – problem solved.

Easy Does It:

Take a sec when putting on your leggings. Adjust them carefully so everything sits just right without any weird bunching.

5 Ways to Address or Prevent Camel Toe in Yoga Pants

How to avoid camel toeing in leggings

Alright, fellow yogis, let’s address the elephant in the room – camel toe in yoga pants. No worries, we’ve got your back (or front, in this case). Here are five smart moves to keep camel toe at bay during your yoga sessions:

Size Matters, Always:

First things first, get the right size! Opt for yoga pants that fit comfortably around your waist and hips. If they’re too tight, camel toe might sneak in.

Choose the Right Fabric:

Look for yoga pants made from high-quality, stretchy fabrics. Moisture-wicking materials with a bit of spandex are your go-tos, ensuring flexibility without revealing too much.

Seek Out Seamless Designs:

Seamless yoga pants are your secret weapon. Without those prominent seams, there’s less chance of camel toe making an appearance.

Try a Thicker Waistband:

Consider yoga pants with a thicker waistband. It not only adds a stylish touch but also helps distribute pressure, minimizing the risk of camel toe.

Rock the High-Waisted Look:

High-waisted yoga pants are not just trendy; they provide extra coverage in the crotch area, reducing the likelihood of camel toe stealing the show.

Discovering Your Comfort Zone: A Personal Journey

Alright, let’s talk about getting comfy – and no, it’s not just about finding that perfect pair of sweatpants. It’s a whole vibe, a combo of things that make you feel like you’re in your element. Let’s break it down:

Dress the Part:

First off, what you wear matters. It’s like finding the Goldilocks zone for fabrics, styles, and fits. Dive into the closet and experiment with what feels like a warm hug. Comfort is not just about looking good but feeling good in your own skin.

Daily Rituals:

Think about your daily routines – morning coffee rituals, maybe some evening wind-down time. Find those activities that make you go “ahh.” Whether it’s a calming hobby or just taking a moment for yourself, these rituals are your personal comfort jackpot.

Your Space, Your Sanctuary:

Look around – where you live, where you work. Create spaces that feel like your personal oasis. It could be a cozy corner at home or just a mental zone where you can unwind. Crafting an environment that vibes with your peace of mind is key.

Conclusion

In the grand adventure of life, finding comfort isn’t just about sinking into a cozy chair or slipping into the perfect pair of shoes. It’s about weaving together a tapestry of moments, choices, and environments that make you feel genuinely at ease. Whether it’s the clothes that embrace you, the daily rituals that ground you, or the spaces and connections that uplift you – it’s all part of a personal journey towards contentment, avoid camel toeing in leggings.

So, as you navigate the ebb and flow of what brings you comfort, remember there’s no one-size-fits-all formula. It’s about tuning into your own rhythm, discovering what resonates with your soul, and celebrating the unique symphony of elements that define your comfort zone. Here’s to embracing comfort in every step, savoring the little joys, and creating a life that feels like your favorite, perfectly worn-in sweater – snug, familiar, and just right.

FAQ

Q1: How do I make my clothes more comfortable?

A: It’s all about the right fit and feel. Choose clothes that match your size and fabrics that give you that cozy vibe. Your comfort, your style!

Q2: Why do daily rituals matter for comfort?

A: Daily rituals set the tone for your day. Whether it’s a morning routine or an evening wind-down, these habits bring a sense of calm and familiarity.

Q3: Any tips for creating a comfy personal space?

A: Make it your own! Add elements that make you happy – cozy blankets, your favorite scent, or pictures that bring a smile. Personalize it to reflect you.

Q4: Why is social comfort important in life?

A: Social comfort is like soul food. Surround yourself with folks who get you, support you, and let you be your true self. It’s all about uplifting connections.

Q5: How does self-discovery tie into comfort?

A: Knowing yourself is like having the master key to comfort. It helps you make choices aligned with your true self, fostering a life that feels just right.

How to avoid camel toeing in leggings Read More »

Best men's underwear for ball support

Best men’s underwear for ball support

Best men's underwear for ball support

Introduction(Best men’s underwear for ball support)

Let’s talk about something we all care about but might not always discuss openly – the importance of good ball support in men’s underwear. I mean, we’ve all been there, right? That uncomfortable feeling when things aren’t quite where they should be. It’s not just about avoiding awkward adjustments; it’s about our overall comfort and well-being.

In this blog, we’re diving into the world of the best men’s underwear for solid ball support. We’re going to explore different styles, materials, and brands that go beyond just looking good. We’re talking about undies that prioritize how you feel all day long.

Whether you’re an active guy looking for support during workouts or just someone who wants to get through the day without constantly readjusting, we’ve got you covered. We’ll break down the anatomy-friendly designs, check out the latest fabric technologies, and guide you through what makes a pair of underwear not just stylish but seriously comfy.

So, if you’re ready to upgrade your underwear game and prioritize your comfort, stick around. We’re on a journey to find the best supportive undies out there, because feeling great is what it’s all about, one pair at a time.

What is  ball support underwear

Ball support underwear is a specialized type of men’s undergarment designed to provide additional support and comfort to the genital area, particularly the testicles, colloquially referred to as “balls.” These underwear typically feature unique designs, innovative pouches, or specific technologies aimed at cradling and securing the testicles, offering a snug fit and reducing friction and discomfort during various activities.

The primary goal of ball support underwear is to enhance the wearer’s overall comfort, especially during physical activities like sports or workouts. The designs often focus on minimizing chafing, providing optimal support, and preventing the shifting of the genital area, promoting a more secure and comfortable experience.

Common features found in ball support underwear include patented pouch designs, three-dimensional fits, moisture-wicking fabrics, and sometimes additional protective elements like cups for impact resistance. These features contribute to a more tailored and supportive fit, addressing the unique anatomical considerations of the male genital region.

Benefits for Using ball support underwear

Using ball support underwear can offer several benefits for men, addressing comfort, support, and overall well-being:

Feels Like a Hug:

Ever had your underwear ride up or felt things weren’t quite in place? Ball support undies are like a gentle hug for your boys, keeping everything comfortably where it should be.

No More Chafing Drama:

Say goodbye to the annoying chafing and irritation. These undies are designed to reduce friction, making them a game-changer for those long days or intense workouts.

Ready for Action:

Whether you’re hitting the gym, going for a run, or just doing your thing, the extra support these undies provide makes them your trusty sidekick during all kinds of activities.

Stay Dry Down There:

Thanks to moisture-wicking fabrics, you won’t be feeling like a swamp down below. These undies keep things cool and dry, even when the heat is on.

Confidence Boost:

Knowing you’ve got the right support in all the right places can do wonders for your confidence. It’s like having a secret weapon under your everyday wear.

No More Awkward Adjustments:

Tired of constantly readjusting yourself? The unique designs and anti-roll features keep everything in check, so you can go about your day without the need for constant tweaks.

Versatile Vibes:

These undies aren’t just for the gym. They’re versatile enough for everyday wear, bringing that extra comfort and support to whatever you’re up to – from the office to a night out.

Innovation for Your Bits:

Some of these undies come with fancy innovations like patented pouches or compression features, offering a tailored experience for the boys. It’s like upgrading from a flip phone to a smartphone – for your underwear.

Stays Put During Impact:

If your day involves activities with potential groin impacts (ouch!), certain designs, especially those with added protective elements, offer that extra layer of defense. Safety first!

Overall Happy Package:

Bottom line – ball support undies prioritize your comfort and well-being. It’s not just underwear; it’s your daily ally in the quest for comfort, support, and maybe even a little confidence boost.

Best men’s underwear for ball support

Hey folks, let’s get down to the nitty-gritty of men’s underwear, specifically those designed with a pouch for extra ball support. In the quest for ultimate comfort, we’ve scoured Amazon for some top contenders. Here’s a sneak peek into the features and pros and cons of seven options that caught our eye:

All Citizens Men’s Performance Underwear:

Best men's underwear for ball support

Get ready for unmatched comfort with All Citizens Men’s Performance Underwear. These undies are more than just your everyday pair – they come with a patented design that sets them apart. With a focus on breathability, they keep you cool throughout the day, making them perfect for those with an on-the-go lifestyle. Plus, the athletic fit and quick-dry tech ensure you stay supported and fresh, whether you’re hitting the gym or just conquering your daily grind. It’s not just about looking good; it’s about feeling great.

Features:

Patented Performance Design.

Breathable fabric for comfort.

Athletic fit for active lifestyles.

Quick-dry technology.

Stylish design.

Pros:

Excellent ball support.

Quick-drying material.

Stylish for everyday wear.

Ideal for sports and workouts.

Patented design for added comfort.

Cons:

Pricier compared to basic options.

Limited color options.

Sizing may vary for some users.

Some might find the athletic fit too snug.

The pouch design may take some getting used to.

Shock Doctor Compression Short with Athletic Supporter:

Best men's underwear for ball support

Level up your game with the Shock Doctor Compression Short featuring a Bio-Flex cup for that extra layer of protection. Made for the active folks out there, these compression shorts snugly fit, wick away moisture, and keep you dry during those intense workouts. The ventilated design adds breathability, and the antimicrobial tech keeps unwanted odors at bay. If you’re after a mix of support and security, these compression shorts have got your back – or rather, your front.

Features:

Compression shorts with a Bio-Flex cup.

Moisture-wicking fabric.

Ventilated design for breathability.

Antimicrobial technology.

Elastic waistband for a secure fit.

Pros:

Provides extra protection with a cup.

Excellent moisture-wicking properties.

Ventilation keeps you cool.

Antimicrobial tech for odor control.

Secure fit with an elastic waistband.

Cons:

Cup may be uncomfortable for some.

Limited style options.

Cup may shift during intense activities.

Sizing might be tricky.

The cup may need extra care during washing.

All Citizens Paradise Pocket Athletic Underwear:

Best men's underwear for ball support

Enter a realm of unique support with All Citizens Paradise Pocket Athletic Underwear. The innovative Paradise Pocket design takes care of business while the soft and breathable fabric ensures comfort all day long. Ideal for those who want a blend of style and function, these undies come in a variety of trendy patterns and colors, letting you showcase your personality with every step.

Features:

Paradise Pocket design.

Soft and breathable fabric.

Athletic fit for comfort.

Quick-dry technology.

Stylish patterns and colors.

Pros:

Innovative Paradise Pocket for support.

Soft and breathable for all-day wear.

Ideal for active lifestyles.

Quick-drying material.

Stylish patterns for a trendy look.

Cons:

Price may be on the higher side.

Limited size range.

Some might find the Paradise Pocket design different.

Patterns may fade with time.

Not suitable for those seeking a basic design.

Saxx Underwear Boxer Briefs with BallPark Pouch:

Meet your new go-to pair – Saxx Underwear Boxer Briefs with the patented BallPark Pouch. These undies redefine what it means to be supported and comfortable, featuring a Three-D Fit for freedom of movement, moisture-wicking fabric to keep things dry, and flat out seams for that seamless feel. Toss in the anti-roll waistband, and you’ve got a winning combo of style and practicality.

Features:

Patented BallPark Pouch.

Three-D Fit for support.

Moisture-wicking fabric.

Flat Out Seams for comfort.

Anti-roll waistband.

Pros:

BallPark Pouch for excellent support.

Comfortable fit with Three-D design.

Moisture-wicking keeps you dry.

Seamless construction for reduced irritation.

Anti-roll waistband for a secure fit.

Cons:

Premium price point.

Limited color choices.

Some may find the fit too snug.

Pouch design may not suit everyone.

Elasticity may reduce over time.

Hanes Ultimate Total Support Pouch Boxer Briefs:

Best men's underwear for ball support

Experience total support with Hanes Ultimate Total Support Pouch Boxer Briefs. Sporting a well-designed pouch, a flexible Comfort Flex waistband, and soft, breathable fabric, these undies are tailor-made for everyday wear. If you’re all about reliable comfort, these boxer briefs strike the perfect balance between support and ease.

Features:

Total Support Pouch design.

Comfort Flex waistband.

Soft and breathable fabric.

Tagless for added comfort.

Durable construction.

Pros:

Total Support Pouch for reliable comfort.

Flexible waistband for a custom fit.

Breathable fabric for all-day wear.

Tagless design reduces irritation.

Durable construction for long-lasting use.

Cons:

Basic design compared to premium options.

Limited style choices.

Sizing may run large for some.

Elasticity may wear out over time.

Less advanced features compared to high-end brands.

Saxx Underwear Boxer Briefs with BallPark Pouch (Different Variant):

Here’s another variant of Saxx Underwear Boxer Briefs, featuring the same patented BallPark Pouch. With a modern design, this variant brings together functionality and style, making it an ideal choice for those who want the best of both worlds.

Features:

BallPark Pouch technology.

Three-D Fit for support.

Moisture-wicking fabric.

Flat Out Seams for reduced irritation.

Modern design.

Pros:

BallPark Pouch offers exceptional support.

Three-D Fit for a comfortable feel.

Moisture-wicking keeps you dry.

Seamless construction for reduced irritation.

Stylish design for a modern look.

Cons:

Higher price point.

Limited color options.

Some may find the fit too snug.

Pouch design may not suit everyone.

Elasticity may reduce over time.

Saxx Underwear Boxer Briefs with BallPark Pouch (Another Variant):

Embrace excellence with yet another variant of Saxx Underwear Boxer Briefs, showcasing the patented BallPark Pouch. With the Three-D Fit, moisture-wicking fabric, and an anti-roll waistband, this variant promises top-notch support in a stylish package. Because feeling good is what it’s all about.

Features:

Patented BallPark Pouch.

Three-D Fit for support.

Moisture-wicking fabric.

Flat Out Seams for comfort.

Anti-roll waistband.

Pros:

BallPark Pouch for excellent support.

Comfortable fit with Three-D design.

Moisture-wicking keeps you dry.

Seamless construction for reduced irritation.

Anti-roll waistband for a secure fit.

Cons:

Premium price point.

Limited color choices.

Some may find the fit too snug.

Pouch design may not suit everyone.

Elasticity may reduce over time.

Conclusion for Best men’s underwear for ball support

The best men’s underwear offering top-notch ball support, it’s clear that each option brings its own unique blend of innovation, comfort, and style to the table. Whether you lean towards the patented design of All Citizens Men’s Performance Underwear, the added protection of the Shock Doctor Compression Short with Athletic Supporter, or the distinctive Paradise Pocket of All Citizens Athletic Underwear, there’s a pair tailored to meet your specific needs.

For those drawn to the revolutionary BallPark Pouch, both Saxx Underwear Boxer Briefs variants deliver exceptional comfort with features like Three-D Fit and moisture-wicking fabric. Meanwhile, the Hanes Ultimate Total Support Pouch Boxer Briefs strike a balance between reliable support and everyday wear.

Ultimately, the best choice comes down to personal preferences – whether it’s a focus on cutting-edge design, additional protection, or a perfect blend of support and style. Regardless of your pick, upgrading your underwear game to prioritize ball support is a surefire way to enhance both your comfort and confidence. So, here’s to finding the perfect fit and ensuring your most important assets stay well-supported throughout every adventure life throws your way. Happy wearing!

(FAQ) – Best Men’s Underwear for Ball Support

Q: What makes men’s underwear with ball support different from regular underwear?

A: Men’s underwear with ball support is designed with features like patented pouches, compression technologies, and unique designs to provide additional support and comfort to the genital area, addressing the specific needs of men seeking enhanced protection and ease.

Q: How do I choose the right size for ball support underwear?

A: Refer to the sizing charts provided by the brand or manufacturer. Take accurate measurements of your waist and hips, and consider the fit you prefer – whether it’s snug or more relaxed. Keep in mind that a proper fit is crucial for optimal ball support.

Q: Are these underwear suitable for everyday wear or just for sports activities?

A: Many of the featured underwear options are versatile enough for both everyday wear and sports activities. The choice depends on your personal preferences and the level of support you desire in different scenarios.

Q: Do these underwear options work for all body types?

A: Most brands offer a range of sizes to accommodate different body types. It’s important to check the sizing options available and choose the one that best matches your measurements. Additionally, some brands may offer specific styles or fits that cater to various body shapes.

Q: How do I care for men’s underwear with ball support?

A: Always follow the care instructions provided by the manufacturer. Typically, washing in cold water and avoiding harsh detergents helps maintain the integrity of the fabric and elastic. Air-drying is often recommended to prevent damage.

Q: Are these underwear options suitable for sensitive skin?

A: While many brands prioritize comfort, it’s advisable to check for any specific materials or features designed for sensitive skin. Look for underwear with flat seams and tagless designs, which can reduce irritation.

Q: Can I use these underwear during intense physical activities like workouts or sports?

A: Yes, many of the featured underwear options are designed to provide support during intense physical activities. Look for features like moisture-wicking fabric, compression technologies, and athletic fits for optimal performance and comfort.

Q: Are these products available in various colors and styles?

A: Yes, most brands offer a variety of colors and styles to cater to individual preferences. Whether you prefer classic colors or bold patterns, you can find options that align with your personal style.

Q: Are these underwear options suitable for all climates?

A: Many of the featured products incorporate breathable fabrics and moisture-wicking technologies, making them suitable for various climates. However, individual preferences may vary, so it’s essential to consider your comfort needs in specific weather conditions.

Q: Where can I purchase the featured underwear options?

A: The featured underwear options are available on Amazon. You can find detailed product information, customer reviews, and make purchases directly through the provided links.

Best men’s underwear for ball support Read More »

What color cancels out pink in hair

What color cancels out pink in hair

Introduction:

What color cancels out pink in hair

Hey there, fellow hair enthusiasts! We’ve all been there – what started as a cute pink hair experiment ended up being a bit more vibrant than anticipated. But fear not! In this article, we’re diving into the world of color correction to figure out just what color cancels out that stubborn pink.

So, if you’re scratching your head wondering how to tone down the pink or saying goodbye to those rosy undertones, you’re in the right place. Let’s unravel the mysteries of the color wheel, find out which colors play nice together, and explore some practical tips to get your hair back to the shade you adore.

Whether you’re a seasoned hair adventurer or just testing the colorful waters, join us on this journey to hair happiness. We’re about to spill the secrets on how to fix pink hair and get you back to flaunting those gorgeous locks. Let’s kick off this colorful ride together!\

What is  Color Theory

Color theory is like the magical playbook that artists, designers, and creators use to understand and harness the power of colors. It’s the behind-the-scenes guide to why certain colors look awesome together and why others might clash.

Imagine a color wheel as the maestro orchestrating this symphony. At its core are the primary colors—red, blue, and yellow. Mix those, and voila, you get secondary colors like green, orange, and purple. Now, add a dash of sophistication with tertiary colors by blending a primary and a neighboring secondary color.

The color wheel is not just a pretty circle; it’s a map of relationships. Complementary colors, situated directly across from each other, are like best friends. They enhance each other’s strengths, making the whole scene pop. Think red and green, or blue and orange.

On the softer side, analogous colors cozy up next to each other on the wheel, creating pleasing, harmonious vibes. Triadic colors form lively groups of three, evenly spaced around the wheel, providing balance and contrast. Tetradic schemes, involving pairs of complementary colors, bring a rich palette to the table.

But why does this matter beyond art class? Well, understanding color theory is like having a superpower in various creative fields. Graphic designers use it to create eye-catching visuals, fashionistas play with it to craft stunning outfits, and interior designers use it to evoke specific moods in spaces.

So, whether you’re picking out an outfit, decorating your room, or just appreciating a beautiful painting, color theory is the unsung hero, quietly influencing the world around us in ways we might not even notice. It’s a fascinating journey into the world of hues, shades, and tones that adds a splash of brilliance to our lives.

Which color can cancel out pink in hair

Spot the Arch-Nemesis:

Pink’s cosmic foe is green. Yep, you heard it right. On the color wheel, green is chilling on the opposite side, making it the perfect partner to cancel out pink.

Think Complementary:

To tone down pink, look for colors in the green squad. A toner or color corrector with a greenish vibe is what you’re after.

Intensity Check:

If your pink is on the subtle side, a milder green might work. Got a bold pink? Time to bring in the heavy artillery with a vibrant green.

Shade Play:

Greens come in all sorts of shades. Some lean towards blue, others towards yellow. Experiment with different green shades to find the perfect match for your pink dilemma.

Pro Tip:

When the pink situation gets tricky, don’t hesitate to call in the professionals. A seasoned colorist can unravel the color chaos and guide you to hair nirvana.

Choosing the Right Color Corrector for What color cancels out pink in hair

Choosing the right color corrector is like finding the superhero for your hair. Whether you’re dealing with unwanted pink, brassiness, or any other hue hiccup, here’s your guide to color corrector enlightenment:

Identify the Issue:

Pinpoint what you’re trying to correct. Is it brassiness in blonde hair, an overly vibrant pink, or something else? Knowing your hair color dilemma helps you pick the right corrector.

Refer to the Color Wheel:

Remember that color wheel from art class? It’s your best friend. To neutralize a color, go for its opposite on the wheel. For example, green correctors can counteract red or pink tones.

Consider Your Hair Color:

Not all correctors work for every hair color. If you’re a brunette trying to combat red undertones, a green corrector might be too harsh. In such cases, opt for a blue-based corrector.

Choose the Right Shade:

Correctors come in various shades, so pick one that matches the intensity of the issue. For subtle problems, a milder corrector might do the trick, while more intense issues may require a stronger one.

Formulation Matters:

Consider the formulation of the corrector. Some are leave-in treatments, while others are shampoos or masks. Choose based on your preference and the severity of the issue.

Perform a Strand Test:

Don’t skip the strand test! Apply a small amount of the corrector on a hidden section of your hair to see how it reacts. This way, you avoid any unpleasant surprises on your entire head.

Consult a Professional:

If you’re unsure about which corrector to choose or if your color issue is complex, consult a professional colorist. They can provide personalized advice based on your hair type and color history.

Consider Your Hair Health:

Some correctors contain conditioning agents, while others might be more intense. Take into account the health of your hair when choosing a corrector, especially if it has been chemically treated.

Follow Instructions:

Read and follow the instructions on the product meticulously. Overusing or leaving a corrector on for too long can lead to unintended results.

Application Techniques(What color cancels out pink in hair)

Applying a color corrector to cancel out pink in hair is a bit of an art. Here’s a step-by-step guide to help you tackle those rosy undertones like a pro:

Preparation is Key:

Begin with clean, dry hair. Wash with a gentle, sulfate-free shampoo, and skip the conditioner for now. You want your hair to be ready to absorb the corrector.

Section Your Hair:

Divide your hair into manageable sections. This ensures even application and helps you focus on one area at a time.

Wear Protective Gear:

Put on gloves to protect your hands from staining. Color correctors can be intense, and you don’t want colorful fingertips.

Apply Corrector Evenly:

Using an applicator brush or your gloved hands, apply the corrector evenly from roots to ends. Make sure you cover each section thoroughly. Work methodically through all the sections.

Comb Through:

After applying the corrector, comb through your hair with a wide-tooth comb. This helps distribute the product evenly and ensures that every strand is covered.

Check Processing Time:

Refer to the product instructions for the recommended processing time. This is the duration the corrector needs to work its magic. Be cautious not to exceed the recommended time to avoid over-processing.

Rinse Thoroughly:

Once the processing time is up, rinse your hair thoroughly with cool water until the water runs clear. This step is crucial to remove excess product and prevent any unwanted color shifts.

Condition Your Hair:

After rinsing, use a color-safe conditioner to nourish your hair. This step is essential for maintaining the health of your hair post-color correction.

Style as Desired:

Once your hair is dry, style it as you normally would. You can use heat styling tools or air-dry, depending on your preference.

Monitor Results:

Assess the results in different lighting conditions. Sometimes colors can appear differently under various lights, so make sure you’re happy with the outcome in natural and artificial light.

Repeat if Necessary:

If the pink tones persist, you may need to repeat the process. However, it’s crucial to wait a reasonable amount of time between sessions to prevent excessive damage to your hair.

Maintaining tips for after use color Corrector

Maintaining your hair color after using a color corrector is crucial for keeping that beautiful hue looking fresh and vibrant. Here are some post-color corrector maintenance tips to keep your locks in top-notch condition:

Switch to Color-Safe Products:

Use shampoos and conditioners specifically designed for color-treated hair. These products are formulated to be gentle, helping to preserve your corrected color.

Wash with Cool Water:

Opt for cooler water temperatures when washing your hair. Hot water can strip away color and natural oils, leading to faster color fade.

Limit Washing Frequency:

Reduce the frequency of hair washing to help maintain the longevity of your color. Dry shampoo can be a lifesaver between washes, keeping your hair feeling fresh.

Deep Condition Regularly:

Treat your hair to regular deep conditioning treatments to keep it moisturized. This is especially important if the color correction process has left your hair feeling a bit dry.

Protect Your Hair from the Sun:

UV rays can contribute to color fading. Wear a hat or use a UV protection spray when exposed to sunlight to shield your hair.

Avoid Chlorine and Saltwater:

Chlorine and saltwater can be harsh on colored hair. If you’re swimming, consider protecting your hair with a swim cap or applying a protective spray beforehand.

Trim Regularly:

Schedule regular trims to maintain the health of your hair. This helps prevent split ends and keeps your color looking fresh.

Minimize Heat Styling:

Limit the use of heat styling tools, and when you do use them, apply a heat protectant to prevent damage. Opt for lower heat settings whenever possible.

Touch Up as Needed:

If you notice any color changes over time, you can touch up your hair with the color corrector as necessary. Follow the application techniques recommended for your specific product.

Consult with Your Stylist:

Schedule regular check-ins with your hairstylist for maintenance trims and professional advice on preserving your color. They can provide personalized tips based on your hair type and color.

Stay Hydrated and Eat Well:

Keep your hair healthy from the inside out by staying hydrated and maintaining a balanced diet rich in vitamins and nutrients.

FAQ(What color cancels out pink in hair)

Q1: What color cancels out pink in hair?

A1: Green is the opposite of pink on the color wheel, so a green-based color corrector or toner is commonly used to neutralize or cancel out pink tones in hair.

Q2: Can I use any green product to cancel out pink tones?

A2: Not necessarily. Look for color correctors or toners specifically formulated for hair, as they are designed to provide subtle adjustments without causing damage.

Q3: How do I choose the right green shade for my hair?

A3: Consider the intensity of the pink in your hair. For subtle pink tones, a milder green may suffice, while vibrant pinks may require a stronger, more intense green.

Q4: Can I use regular hair dye with a green tint for color correction?

A4: It’s not recommended. Regular hair dye is formulated for significant color changes, while color correctors are designed for more subtle adjustments to undertones.

Q5: How long does the green color correction last?

A5: The duration of the correction’s effectiveness depends on factors like hair care routine and the quality of products used. Regular maintenance is essential for prolonged results.

Q6: Can I do the green color correction at home?

A6: Yes, you can, but it’s crucial to follow the product instructions carefully, perform a strand test, and seek professional advice if unsure, especially for complex color issues.

Q7: How often should I touch up with the green color corrector?

A7: Touch-ups may be needed as pink tones reappear. The frequency depends on individual hair growth and how well the initial correction was executed.

Q8: Can I use green color corrector on all hair colors?

A8: Green color correctors are generally effective for canceling out pink tones in various hair colors, but considerations like hair health and the specific shade of pink may influence results.

What color cancels out pink in hair Read More »

Best cap highlights kit

Best cap highlights kit

Introduction

Best cap highlights kit

Embarking on a journey to transform your hair with highlights is like unlocking a world of possibilities right in the comfort of your own space. We’ve all had that moment when we’ve admired someone’s perfectly highlighted hair and wished we could achieve the same effortlessly radiant look. Well, enter cap highlights kits – your ticket to achieving those salon-worthy highlights without the salon visit.

These kits have become the go-to solution for anyone looking to add a touch of flair to their locks. Designed with simplicity and convenience in mind, cap highlights kits put the power of professional-looking highlights directly into your hands. No more scheduling appointments or shuffling through salon magazines – with a cap highlights kit, you’re in control.

a highlighting cap made from flexible materials like silicone, accompanied by a handy highlighting hook. It’s a straightforward setup that caters to both newcomers to the world of hair coloring and those who’ve been experimenting with hues for years. What makes it so user-friendly? The strategically placed perforations on the cap make sectioning your hair a breeze, allowing for precise color placement and customization.

The beauty of cap highlights kits lies in their versatility. Whether you’re aiming for a subtle enhancement of your natural color or diving headfirst into a vibrant fashion statement, these kits offer a spectrum of color options to suit your mood and style. It’s your canvas, and the cap highlights kit is your paintbrush.

Over the next few sections, we’ll delve into the nitty-gritty of the application process, explore the palette of color options, discuss the longevity of your newfound highlights, and ensure that your DIY journey is not only creative but also comfortable and safe. So, get ready to discover the world of cap highlights kits.

Best cap highlights kit Product List

Reusable Silicone Highlighting Cap

cap highlights kit

Embarking on a journey of DIY hair transformation? The Reusable Silicone Highlighting Cap offers a promising solution. Crafted with durable silicone and featuring strategically placed perforations, this cap simplifies the highlighting process. Join me as we explore its user-friendly application, versatility in color options, and the longevity of highlights.

Features:

Durable silicone material.

Precision holes for easy sectioning.

Reusable design for sustainability.

Pros:

User-friendly application process.

Versatile for various coloring products.

Long-lasting highlights.

Cons:

Limited information on color options.

May require additional tools for precision.

WLLHYF Colouring and Highlighting Cap :

cap highlights kit

Are you craving versatility in your hair color experiments? The WLLHYF Colouring and Highlighting Cap presents a dual-use design with quality materials. Explore its all-over holes for even color distribution, user-friendly application, and comfort as we navigate through its potential for creative at-home hair transformations

Features:

Quality material for durability.

Dual-use design for coloring and highlighting.

All-over holes for even color distribution.

Pros:

User-friendly application process.

Versatility in color options.

Comfortable and soft material.

Cons:

Limited information on duration of highlights.

Reusable design not explicitly stated.

L’Oreal Paris Pull-Through Cap Highlights Kit

cap highlights kit

Achieving salon-quality highlights at home? Enter the L’Oreal Paris Pull-Through Cap Highlights Kit. This kit, featuring a pull-through cap and champagne-toned highlights, promises precision and a natural look. Join me as we uncover the simplicity of the application process, customization options, and the overall experience.

Features:

Pull-through cap for controlled highlights.

Frosting and highlighting in one kit.

Champagne-toned highlights for a natural look.

Pros:

Clear instructions for easy use.

Precise and controlled application.

Suitable for achieving a natural look.

Cons:

Limited customization compared to other kits.

Results may vary based on hair type

Pre-punched Highlight Cap

cap highlights kit

Simplicity meets convenience with the Pre-punched Highlight Cap. Ready-to-use with pre-punched holes, this cap offers an affordable option for DIY enthusiasts. Discover its suitability for both coloring and highlighting, ease of application, and the practicality it brings to at-home hairdressing

Features:

Pre-punched holes for convenience.

Suitable for highlighting and coloring.

Professional-grade for at-home use.

Pros:

Ready-to-use design for easy application.

Versatility in coloring techniques.

Affordable option.

Cons:

Limited information on color options.

May require additional tools for precision.

Reusable Professional Silicone Highlighting Cap

cap highlights kit

For those seeking a professional touch at home, the Reusable Professional Silicone Highlighting Cap steps into the spotlight. Crafted with high-quality silicone and a dual-use design, this cap caters to both coloring and highlighting needs. Let’s delve into its specialized features, versatility, and durability for an in-depth understanding.

Features:

High-quality silicone for durability.

Dual-use design for coloring and highlighting.

Specialized for professional use.

Pros:

All-over holes for comprehensive color coverage.

Versatility in coloring techniques.

Durable for extended use.

Cons:

May be too specialized for casual users.

Higher price point.

Coloring and Highlighting Reusable Cap

Eco-conscious and creative? The Coloring and Highlighting Reusable Cap might be your ideal companion. Boasting a dual-use design and a reusable approach, this cap is tailored for sustainable at-home hair transformations. Join me as we explore its versatility, user-friendly design, and eco-friendly features.

 Features:

Dual-use design for coloring and highlighting.

Reusable and eco-friendly.

Suitable for at-home hairdressing.

Pros:

Versatility in color options.

Sustainable design.

User-friendly for DIY enthusiasts.

Cons:

Limited information on material quality.

May require practice for precise application.

Silicone Reusable Highlight Cap

Flexibility and sustainability come together in the Silicone Reusable Highlight Cap. Crafted with comfortable silicone material, this cap is suitable for both highlighting and bleaching. Let’s navigate through its user-friendly design, versatility in coloring techniques, and the sustainable approach it brings to DIY hair highlighting.

Features:

Silicone material for flexibility.

Reusable for sustainable use.

Suitable for highlighting and bleaching.

Pros:

Comfortable fit during application.

Versatility in coloring techniques.

Reusable design for sustainability.

Cons:

Limited information on color options.

May require additional tools for precision.

Application Process for Cap Highlights Kit

Achieving salon-worthy highlights at home is an exciting venture, and mastering the application process is key to a successful outcome. Here’s a general guide on how to use a cap highlights kit:

1. Prep Your Hair:

Start with clean, dry hair. Avoid applying the highlights immediately after washing, as the natural oils can provide a protective barrier for your scalp.

Detangle your hair to ensure even color distribution.

2. Choose Your Color:

Select your preferred highlighting color or bleach, depending on the look you want to achieve. Ensure that the product is compatible with the cap highlights kit.

3. Section Your Hair:

Place the highlighting cap on your head and secure it tightly. Ensure that all your hair is neatly tucked under the cap.

Use the provided hook or a highlighting tool to pull strands of hair through the pre-made holes in the cap.

4. Apply the Color:

If you’re using a cap with pre-punched holes, apply the color or bleach to the exposed strands of hair.

For caps without pre-punched holes, use the cap as a guide and apply the color evenly to the pulled-through strands.

5. Time the Process:

Follow the recommended processing time mentioned in the product instructions. This ensures that the color develops properly without causing damage to your hair.

6. Rinse and Condition:

Once the processing time is complete, carefully remove the cap and rinse your hair thoroughly. Use a color-safe shampoo to remove any excess product.

Apply a deep conditioning treatment to nourish and moisturize your highlighted strands.

7. Style as Desired:

After rinsing and conditioning, you can style your hair as usual. Whether you prefer natural waves, straight locks, or voluminous curls, your newly highlighted hair is ready to shine.

Tips for a Successful Application:

Take your time during the sectioning process to ensure even highlights.

Wear old clothes or use a cape to protect your clothing from any color splatters.

Conduct a strand test before applying the color to your entire head to ensure you achieve the desired result.

Comfort and Safety with Cap Highlights Kits

Ensuring comfort and safety during the hair highlighting process is essential to make the experience enjoyable and protect the health of your hair and scalp. Here’s how you can prioritize comfort and safety when using cap highlights kits:

1. Material Matters:

Opt for highlighting caps made from soft and flexible materials, such as silicone. This ensures a comfortable fit on your head and reduces the risk of discomfort during the application process.

2. Proper Ventilation:

Look for highlighting caps with strategically placed perforations or pre-punched holes. These not only aid in even color distribution but also provide proper ventilation, minimizing the risk of scalp irritation.

3. Snug but Not Tight:

Ensure that the cap fits snugly on your head without being too tight. A comfortable fit prevents the cap from slipping during the application and minimizes any tension on your scalp.

4. Avoid Overlapping Products:

Be cautious not to overlap highlighting or coloring products on previously treated hair. This precaution helps prevent overprocessing, which can lead to dryness and damage.

5. Patch Test:

Before applying the color or bleach to your entire head, conduct a patch test on a small section of hair to check for any adverse reactions. This is especially important for individuals with sensitive skin or allergies.

6. Follow Product Instructions:

Strictly adhere to the instructions provided with the cap highlights kit. This includes recommended processing times, mixing ratios for color or bleach, and any additional safety precautions.

7. Protect Your Skin:

Apply a protective barrier, such as petroleum jelly, around your hairline and ears to prevent the color or bleach from coming into direct contact with your skin. This extra step adds an additional layer of safety.

8. Gentle Removal:

When removing the cap, do so gently to avoid pulling or tugging on your hair. This gentle approach minimizes stress on your strands and scalp.

9. Post-Color Care:

After rinsing out the color, use a mild, color-safe shampoo and conditioner to maintain the health of your hair. Applying a deep conditioning treatment can also restore moisture and prevent dryness.

10. Listen to Your Scalp:

If you experience any discomfort, itching, or unusual sensations during the process, it’s crucial to listen to your scalp. If discomfort persists, rinse the color out immediately and consult with a professional or your healthcare provider.

Prioritizing comfort and safety with cap highlights kits ensures that you not only achieve the desired look but also maintain the health and vitality of your hair. By following these tips, you can embark on your at-home highlighting journey with confidence and peace of mind.

FAQ

Q1: What is a cap highlights kit, and how does it work?

A: A cap highlights kit is a DIY hair coloring tool that typically includes a cap made of flexible material, such as silicone, and a highlighting hook. The cap is worn on the head, and strands of hair are pulled through perforations or holes using the hook for precise color application.

Q2: Can I use a cap highlights kit on any hair type?

A: Yes, cap highlights kits are generally suitable for various hair types, including straight, wavy, and curly. However, individuals with extremely short hair may find it challenging to use the cap effectively.

Q3: How do I choose the right color for my highlights?

A: The color choice depends on personal preference and the desired look. Consider factors such as your natural hair color, skin tone, and whether you want subtle or bold highlights. Many kits are compatible with a variety of coloring products, providing flexibility in color options.

Q4: Are cap highlights kits reusable?

A: It depends on the specific kit. Some highlighting caps are designed for multiple uses, making them eco-friendly and cost-effective. Check the product details or packaging for information on reusability.

Q5: Can I achieve salon-quality results with a cap highlights kit?

A: Yes, with proper application and adherence to instructions, cap highlights kits can provide salon-quality results. Practice and attention to detail contribute to achieving the desired look.

Q6: How long do the highlights last?

A: The duration of highlights varies depending on factors such as the type of color used, hair care routine, and individual hair characteristics. Generally, highlights can last several weeks to a few months.

Q7: Can I use a cap highlights kit if I have sensitive skin?

A: Individuals with sensitive skin should perform a patch test before applying color to the entire head. Choose kits with gentle formulations, and if any irritation occurs, discontinue use and consult with a healthcare professional.

Q8: What should I do if the cap slips during application?

A: Ensure the cap is securely fitted on your head before starting the application. If it slips, readjust and secure it tightly. Taking your time during the sectioning process can also help prevent slippage.

Q9: Can I use a cap highlights kit on colored or chemically treated hair?

A: Yes, you can use a cap highlights kit on colored or chemically treated hair. However, consider the overall condition of your hair and avoid overlapping products to prevent overprocessing and potential damage.

Q10: How do I maintain my hair after using a cap highlights kit?

A: After rinsing out the color, use a color-safe shampoo and conditioner to maintain vibrancy. Apply a deep conditioning treatment regularly to keep your hair moisturized and healthy.

Best cap highlights kit Read More »

Best rompers for curvy

Introduction

Hey there, gorgeous! Ever felt like rompers were made for everyone but you? Well, we’re here to change that narrative. Join us on a journey through the world of rompers that are not just cute but also perfect for flaunting those beautiful curves.

Rompers are like the superheroes of fashion, right? They’re comfy, stylish, and can be dressed up or down. But finding the one that hugs your curves just right? That’s a game-changer.

In this review, we’ve done the hunting for you. From casual strolls to beach days and night-outs, we’ve found rompers that will have you looking like a million bucks and feeling even better.

We get it – fashion should be for everyone. That’s why we’ve sifted through brands to find those gems that celebrate curves. Get ready to meet your new closet BFF – the romper that not only fits like it was made for you but also shouts, “Yeah, I’m here, and I look fabulous!”

So, grab a coffee, get comfy, and let’s find that romper that’s going to make you feel unstoppable. This is your guide to rompers that aren’t just about style; they’re about embracing every curve and loving the skin you’re in. Let’s do this!

Best rompers for curvy

1. WDIRARA Women’s Sleeveless Romper with Pockets

Best rompers for curvy

Feature

  1. Stylish Sleeveless Design
  2. Convenient Pockets for a Casual Vibe
  3.  Versatile for Day or Night Wear
  4.  Flattering Cut for Curvier Figures
  5.  Easy to Dress Up or Down

Why We Love

It: This romper combines style and functionality effortlessly, making it a top choice for curvy fashion enthusiasts. The sleeveless design, paired with pockets, adds a touch of practicality to your fashion game.

Cons:

  1. sizing may run a bit small, so consider sizing up for a perfect fit.

2. SOLY HUX Women’s Allover Print Jumpsuit

Best rompers for curvy

Feature

  1. Eye-catching Allover Print
  2. Stretchy Fabric for Comfort
  3.  Wide Leg for a Flattering Silhouette
  4.  Ideal for Casual or Beach Wear
  5.  Effortlessly Stylish Look

Why We Love It:

The allover print and wide-leg design make this jumpsuit a go-to for curvy fashionistas looking to make a statement. The stretchy fabric ensures comfort without compromising on style.

Cons:

  1. Some users noted that the sizing can be a bit tricky, so check the size chart carefully before ordering.

3. WDIRARA Women’s Floral Belted Romper

Best rompers for curvy

Feature

  1. Gorgeous Floral Pattern
  2. Comes with a Stylish Belt
  3.  Multicolor for Versatility
  4.  Flattering V-Neck Design
  5.  Perfect for Spring and Summer

Why We Love It:

The floral pattern and included belt make this romper a must-have for those who want to showcase their curves while embracing a feminine vibe.

Cons:

  1. Some users mentioned that the sizing can be a bit snug, so consider sizing up.

4. SOLY HUX Backless Shirred Jumpsuit

Best rompers for curvy

Feature

  1. Trendy Backless Design
  2. Shirred Detail for a Stylish Touch
  3. Comfortable Fabric
  4. Ideal for Summer Nights
  5. Easy to Dress Up with Accessories

Why We Love It:

The backless design adds a touch of sass, making it a perfect choice for those warm summer evenings.

Cons:

  1. Some users mentioned that the backless design may require a specific bra or adhesive for support.

5. SOLY HUX Women’s Layered Jumpsuit

Best rompers for curvy

Feature

  1. Chic Layered Look
  2. Flared Leg for a Flattering Fit
  3.  Soft and Comfortable Material
  4.  Perfect for Casual Gatherings
  5.  Effortless Boho Vibes

Why We Love It:

The layered look and flared leg give off a boho-chic vibe, making it a go-to for casual outings with a touch of style.

Cons:

  1. Some users noted that the sizing may be a bit long for petite individuals.

6. London Times Flattering Jumpsuit for Any Occasion

Feature

  1. Timeless and Elegant Design
  2. Flattering Neckline for a Classy Look
  3. Perfect for Dressing Up or Down
  4. Versatile for Various Occasions
  5. Comfortable Fit for All-Day Wear

Why We Love It:

This jumpsuit from London Times offers a timeless and elegant design, making it a versatile choice for a range of occasions. The flattering neckline adds a touch of class to your overall look.

Cons:
  1. Some users mentioned that the sizing may run a bit large, so consider checking the size chart for accuracy.

7. Floerns Women’s Plus Size Floral Off Shoulder Romper

Feature

  1. Trendy Off-Shoulder Design
  2. Beautiful Floral Print
  3. Elastic Waist with Drawstring
  4. Plus Size Inclusivity
  5. Lightweight and Breathable Fabric

Why We Love It:

The off-shoulder design and floral print make this romper a trendy and comfortable choice for curvy beauties. The elastic waist with a drawstring ensures a customizable fit.

Cons:

  1. Some users noted that the off-shoulder style may require specific undergarments for optimal comfort.

8. Verdusa Women’s Strapless Tube Top Unitard Jumpsuit

Feature

  1. Strapless and Sexy Tube Top Design
  2. Form-Fitting Unitard Style
  3. Ideal for a Night Out
  4. Stretchy Fabric for Comfort
  5. Easy to Style with Statement Accessories

Why We Love It:

For a bold and sexy look, this strapless unitard jumpsuit from Verdusa takes the spotlight. It’s perfect for a night out on the town and allows you to showcase those curves with confidence.

Cons:

  1. Keep in mind that the strapless design might not be suitable for everyone, and some users recommend using fashion tape for added security.

9. WDIRARA Women’s Off Shoulder Shirred Sleeve Romper

Feature

  1. Chic Off-Shoulder Style
  2. Shirred Sleeve Detail
  3. Elastic Waist for a Defined Look
  4. Trendy and Playful Design
  5. Lightweight Fabric for Summer Vibes

Why We Love It:

This romper combines the best of summer vibes with a chic off-shoulder style and shirred sleeves. The elastic waist adds a touch of definition to your silhouette.

Cons:

  1. A few users mentioned that the elastic around the shoulders might be a bit snug, so consider your comfort preferences.

10. MakeMeChic Women’s Romper with Pockets

Feature

  1. Casual and Relaxed Fit
  2. Convenient Pockets for Functionality
  3. V-Neck for a Flattering Look
  4. Versatile for Day-to-Day Wear
  5. Soft and Breathable Material

Why We Love It:

For an easygoing and comfortable option, this romper from MakeMeChic offers a casual and relaxed fit. The V-neck and pockets add functional and stylish elements.

Cons:

  1. Note that the sizing may vary, and it’s advisable to check recent customer reviews for accurate sizing information.

Flattering Styles for Curvy Figures (Best rompers for curvy)

Hey there! Curves are beautiful, and finding the perfect styles that accentuate them is like discovering your own fashion magic. Let’s dive into some effortlessly flattering looks that’ll have you strutting your stuff with pure confidence!

1. Wrap Dresses:

Why They’re Awesome: Wrap dresses are like your secret weapon. They hug your waist, create that beautiful hourglass shape, and let’s not forget the v-neck that adds that touch of allure.

How to Rock Them: Go bold! Pick vibrant prints or solid colors – whatever speaks to your mood.

2. High-Waisted Jeans:

Why They’re a Win: High-waisted jeans are your best friend. They highlight that waist, elongate those legs, and trust me, they know how to show off your curves.

Styling Hack: Tuck in a cute blouse or throw on a crop top for that trendy vibe.

3. Peplum Tops:

Why They’re Flattering: Peplum tops are like the fairy godmothers of fashion. They define your waist and add that playful flair, making you feel like an absolute queen.

Style Move: Get bold with colors or patterns – let your personality shine through!

4. A-Line Skirts:

Why They’re a Hit: A-line skirts are pure elegance. They flow from the waist, skimming over curves gracefully – a classic choice for that effortlessly chic look.

Style Tip: Tuck in that top – it’s all about flaunting that waist!

5. Jumpsuits with a Cinched Waist:

Why They’re Your Go-To: Jumpsuits with a defined waist are the epitome of style and comfort. They wrap you up beautifully and let you own the room.

Pro Tip: Add a snazzy belt for that extra touch of glam.

6. Off-Shoulder Tops and Dresses:

Why They’re Irresistible: Off-shoulder styles are all about showing off those collarbones and shoulders. Flattering and oh-so-chic!

Style Move: Don’t forget the statement earrings – they’re your outfit’s BFF.

7. Maxi Dresses:

Why They’re a Mood: Maxi dresses are like a breeze of easy elegance. Long, flowing, and a perfect canvas to highlight your curves – a win-win!

Styling Magic: Belt it up for that waist definition – instant glam.

8. Bootcut or Flared Jeans:

Why They’re Timeless: Bootcut or flared jeans are a forever favorite. They balance out those hips and thighs, giving you that timeless, confident look.

Style Move: Throw on some heels – hello, legs for days!

9. Tailored Blazers:

Why They’re a Power Move: Tailored blazers scream sophistication. They create structure, emphasize your waist, and are just downright chic.

Styling Pro: Team them up with fitted trousers or a pencil skirt – you’ll own the office!

10. Bodycon Dresses with Ruching:

Why They’re a Confidence Boost (Best rompers for curvy):

 Bodycon dresses with ruching are like your best-kept secret. They’re snug, they’re stylish, and they embrace your curves with open arms.

Style Secret: Stick to solid colors for that sleek, elongated effect.

Accessorizing Rompers for Curvy Figures (Best rompers for curvy)

Hey fabulous! So, you’ve got those amazing rompers, and now it’s time to take your style up a notch with some killer accessories. Let’s dive into the world of accessorizing for curvy figures – because who says accessories are just for the runway? Let’s make them an everyday affair!

**1. Belt it Up:

Why It Works: A well-chosen belt can do wonders. It defines your waist, adds a touch of structure, and complements the playful vibe of rompers.

Style Tip: Opt for a statement belt to make your outfit pop!

**2. Statement Earrings:

Why They’re a Must: Earrings are your secret weapon. They draw attention upwards, accentuating your gorgeous face and adding a dash of glamour.

Styling Hack: Bold hoops or dangly earrings can transform your look instantly.

**3. Stacked Bracelets:

Why They’re Cool: Bracelets, especially stacked ones, bring an effortlessly chic vibe. They’re playful, add movement to your look, and let’s face it – they’re just fun!

Style Move: Mix and match different bracelets for that eclectic charm.

**4. Layered Necklaces:

Why They’re a Game-Changer: Necklaces add a touch of sophistication. For rompers, go for layered necklaces to create visual interest without overwhelming the outfit.

Pro Tip: Choose different lengths for a trendy, layered effect.

**5. Wide Brim Hat:

Why It’s a Winner: A wide-brim hat is the epitome of chic. It adds a touch of glamour, protects you from the sun, and completes your look with flair.

Style Move: Choose a hat that contrasts or complements your romper for that added wow factor.

**6. Sunglasses:

Why They’re Essential: Sunglasses are not just for sunny days – they’re a style statement. They add an element of mystery and coolness to your ensemble.

Styling Pro: Experiment with different shapes and colors to find what suits your face best.

**7. Ankle Boots or Sandals:

Why They’re Stylish: The right footwear can transform your romper game. Ankle boots add an edge, while sandals keep it light and breezy.

Style Move: Choose footwear that complements the vibe of your romper – it’s all about balance.

**8. Structured Handbag:

Why It’s a Necessity: A well-chosen handbag pulls your entire look together. Opt for a structured bag that adds a touch of sophistication to your romper.

Styling Hack: Choose a bag in a contrasting color to make a statement.

**9. Hair Accessories:

Why They’re Fun: Hair accessories are a playful way to amp up your style. Headbands, hair clips, or scarves – they all add a personal touch.

Style Move: Match your hair accessory with the color palette of your romper for a cohesive look.

**10. Waist Cincher or Corset:

Why It’s a Trend: A waist cincher or corset can be a daring accessory, emphasizing your waist and giving your romper a whole new dimension.

Styling Pro: Pair it with a more understated romper for a bold, fashion-forward look.

Conclusion (Best rompers for curvy)

Alright, fabulous people, we’ve taken a stroll through the world of rompers tailor-made for our gorgeous curves. And guess what? It’s not just about clothes; it’s about feeling like the stunning person you are. Rompers, with all their chic vibes, are like a high-five to our curves!

From those sleeveless stunners to the playful jumpsuits, each romper on our list is a unique gem. Whether you’re vibing with the timeless elegance of a London Times jumpsuit or feeling the floral magic of an off-shoulder number, these rompers are as diverse as our beautiful curves.

But hey, here’s the real deal – the best romper is the one that makes you feel like a million bucks. Consider your style, the occasions you’re gearing up for, and most importantly, embrace the awesomeness of your figure.

So here’s to celebrating those curves, strutting like you own the runway, and expressing your fabulous self through fashion. Romper shopping? It’s a party, and every outfit is an invitation to showcase the incredible you!

FAQ (Best rompers for curvy)

Q1: Are rompers suitable for curvy figures?

Absolutely! Rompers are incredibly versatile and can be incredibly flattering for curvy figures. Look for styles that highlight your favorite features and provide a comfortable fit.

Q2: How do I choose the right size for a romper?

Check the sizing chart provided by the brand or seller, and pay attention to customer reviews for insights into sizing. Some rompers may have stretchy fabric or adjustable features to ensure a better fit.

Q3: What styles are most flattering for curvy figures?

Wrap dresses, peplum tops, jumpsuits with defined waists, and A-line skirts are generally flattering for curvy figures. However, the key is to choose styles that make you feel confident and comfortable.

Q4: Can rompers be dressed up for special occasions?

Absolutely! Many rompers come in elegant designs and fabrics, making them perfect for various occasions. Pair them with stylish accessories, heels, and a clutch for a chic and sophisticated look.

Q5: Are there rompers suitable for different body shapes within the curvy category?

Yes, the market offers rompers designed to suit different body shapes within the curvy category. Look for options with features like adjustable straps, stretchy fabrics, or customizable elements to cater to various body types.

Q6: What accessories complement rompers for curvy figures?

Accessorize with statement belts to define the waist, layered necklaces for added flair, and comfortable heels or sandals to complete the look. Experiment with accessories that match the vibe of your romper and express your personal style.

Q7: How do I care for my rompers to maintain their quality?

Always check the care instructions on the garment label. Typically, rompers made from delicate fabrics may require gentle hand washing or a delicate cycle in the machine. Avoid using harsh detergents, and consider air-drying to preserve the fabric.

Q8: Can rompers be worn in different seasons?

Absolutely! Rompers come in a variety of fabrics and styles suitable for different seasons. Opt for breathable fabrics like cotton or linen for summer, and consider layering with cardigans or jackets for cooler seasons.

Q9: What is the return policy when buying rompers online?

It varies by the seller or platform. Always review the return policy before making a purchase. Check if returns are accepted, the timeframe for returns, and any conditions that may apply.

Q10: How do I style a romper for a casual day out?

For a casual look, pair your romper with comfortable sandals or sneakers, a crossbody bag, and some stylish sunglasses. Add a floppy hat or a denim jacket for extra flair. The key is to keep it easygoing and fun!

Best rompers for curvy Read More »

How to use ion liquid permanent hair color

How to use ion liquid permanent hair color

Introduction

How to use ion liquid permanent hair color

Hey there! Ready to shake things up and give your hair a dazzling makeover? Well, you’re in the right place because we’re diving into the world of ion liquid permanent hair color – your ticket to bold, beautiful hues that stick around.

In this guide, we’re going to break it all down, making it super easy for you to rock a salon-quality look without leaving your home sweet home. Whether you’re a coloring pro or a first-timer, we’ve got your back. We’ll walk you through picking the perfect shade, prepping your hair for the color party, and nailing those application tricks that’ll make heads turn.

Ion liquid permanent hair color is like your personal artist’s palette, offering a rainbow of options. Think rich browns, sizzling reds, and cool-as-ice blondes – whatever floats your color boat, you’re covered.

So, get ready to boost your hair game as we explore the ins and outs of using ion liquid permanent hair color. It’s time to let your creativity shine, embrace the magic of color, and kick off a journey where your hair becomes a canvas for your unique style. Welcome to a world where vibrant, long-lasting color is about to become your new best friend!

Choosing the Right Shade: Your Personal Color Adventure Begins!

Okay, let’s talk about the fun part – choosing the perfect color for your hair makeover with ion liquid permanent hair color. It’s like picking the paint for your masterpiece, and we want to make sure you nail it!

1. Getting Friendly with Numbers:

So, ion uses this numbering system that might seem a bit like secret code. No worries, it’s easy! The number indicates the color level, with 1 being super dark and 10 being the lightest. Want dark and mysterious? Go for the lower numbers. Feeling light and breezy? Head to the higher digits.

2. The Color Chart Magic:

Imagine the ion color chart as your color sidekick. It’s like a visual menu of all the amazing shades. Whether you’re daydreaming of fiery red, chic brunette, or sunlit blonde, this chart is your go-to guru.

3. Your Skin Tone Matters:

Let your natural beauty shine! Warmer tones mesh well with golden and warm colors, while cooler tones rock the ashy and cooler shades. Not sure? No problem – there are neutral options that play nice with everyone.

4. Match Your Vibe:

Your hair color is your style signature. Feeling bold? Go for that vibrant, stand-out color. Want timeless elegance? Stick to the classics. It’s all about expressing YOU.

5. Test the Waters (Patch Testing):

Nobody likes surprises, right? Do a quick patch test – it’s like a sneak peek before the big reveal. Test a small section to make sure you and your color are a match made in hair heaven.

Preparing Your Hair: how to use ion liquid permanent hair color

Alright, let’s chat prep before we dive into the world of ion liquid permanent hair color. Think of it as the warm-up before the main event – setting the stage for that flawless shade you’re about to rock. Here’s your go-to guide for getting your hair prepped and primed:

1. Start with a Clean Slate:

Get that hair squeaky clean a day or two before the big color reveal. Clean hair is like a blank canvas – perfect for soaking up that fresh hue.

2. Give Your Hair Some Love:

Treat your tresses to a round of conditioner. Hydrated hair not only takes color better but also comes out looking healthier and happier.

3. Say No to Styling Products:

Strip it down! Let your hair go au naturel, no gels or sprays. We want it in its raw, natural state to absorb all the color goodness.

4. Shield Your Scalp:

Ever used petroleum jelly as a superhero cape? Apply it along your hairline and ears to keep the color from playing dress-up on your skin.

5. Strand Test, Just for Fun:

Feeling a bit cautious? No harm in a strand test. Grab a small section, try a bit of color, and see how it vibes with your hair. It’s like a sneak peek before the grand performance.

6. Section it Out:

Divide and conquer! Section your hair for easy application. This ensures every strand gets its fair share of color love.

7. Rock the Old Tee:

Time to embrace your favorite worn-out tee. Trust us, it’s a color party, and things might get a tad messy. This way, your wardrobe stays stain-free.

8. Grab Your Stylist Gear:

It’s showtime! Equip yourself with gloves, a mixing bowl, and an applicator brush. Having everything in arm’s reach makes you the master of this color extravaganza.

How to Apply Ion Liquid Permanent Hair Color: A Step-by-Step Guide to Radiance

Alright, time to dive into the exciting part – applying your ion liquid permanent hair color! Whether you’re a first-timer or a seasoned pro, these steps will guide you through the process, ensuring a seamless and stunning application.

Step 1: Section Your Hair

Begin with dry, detangled hair.

Use sectioning clips to divide your hair into manageable sections. This ensures even color distribution and helps you avoid missing any spots.

Step 2: Put on Your Gloves

Slip on the gloves included in your ion liquid permanent hair color kit. This protects your hands from staining and ensures a mess-free application.

Step 3: Mix the Color

In your non-metal mixing bowl, combine the ion liquid permanent hair color with the developer following the instructions on the kit. Stir until the mixture is smooth and consistent.

Step 4: Start Applying

Begin applying the color to one section at a time using the applicator brush. Start at the roots and work your way down to the tips.

Ensure each strand is well-saturated for even color results.

Use the pointed end of the applicator brush to create clean partings for a professional finish.

Step 5: Repeat for Each Section

Continue applying the color to each section until your entire head is covered. Take your time and make sure you don’t miss any spots.

Step 6: Check for Evenness

Once applied, comb through your hair to ensure the color is evenly distributed. This helps prevent any patches or uneven coloring.

Step 7: Set the Timer

Refer to the processing time mentioned in the ion liquid permanent hair color instructions. Set a timer to ensure you leave the color on for the recommended duration.

Step 8: Cover with a Shower Cap

To intensify the color and keep things in check, cover your hair with a plastic shower cap. This traps heat, assisting in the coloring process.

Step 9: Rinse and Condition

Once the processing time is up, hop in the shower and rinse your hair thoroughly until the water runs clear.

Apply the conditioner provided in the kit or a color-safe conditioner to lock in moisture and enhance shine. Leave it on for the recommended time.

Step 10: Style as Desired

Voila! Your hair is now a canvas of vibrant color. Style as usual and enjoy the radiance.

Remember, patience is key, and following the instructions in your ion liquid permanent hair color kit ensures the best results. So, go ahead, embrace the process, and let your true colors shine

Sharing Real Stories: (How to use ion liquid permanent hair color)

Let’s make this personal, shall we? We’re diving into the tales of folks who embraced the vibrant world of ion liquid permanent hair color. These are not just stories; they’re real-life adventures, loaded with insights and tips to make your own color journey a breeze.

1. Jen’s Dive into Deep Brunette Bliss:

Picture this: Jen, a total color geek, spilling the beans about her journey to a luscious, deep brunette using ion liquid permanent hair color. Her nugget of wisdom? “I took it slow, sectioned my hair like a pro, and bam – a brunette that steals the spotlight everywhere.”

2. Mike’s Red Hot Revelation:

Meet Mike, the guy who couldn’t resist the call of fiery red. “Red was a bit out of my comfort zone, but doing a strand test made all the difference. Now, I’m rocking red like it’s my superpower.”

3. Sarah’s Blonde Ambition Success:

Blonde transformations don’t scare Sarah. “Picked a cool blonde, applied to slightly damp hair, and boom – a stunning icy blonde. Trust me, it’s all about those little tricks.”

Tips from the Pros:

Tip 1: Mix it Like a Smooth Operator

Lisa, the seasoned color queen, spills the tea: “Take that extra minute to mix the color and developer like you’re creating magic. A smooth mix equals a killer color.”

Tip 2: Patience During Processing is a Virtue

Amy, our color guru, drops knowledge: “Resist the urge to peek early. Stick to the processing time, and you’ll be rewarded with the color of your dreams.”

Tip 3: Show Some Love After Coloring

Mark, the wise one, advises, “Get yourself a good color-safe shampoo and conditioner. It’s like a spa day for your color, keeping it vibrant for ages.”

Your Tale Awaits:

These stories are the real deal – tales of courage, creativity, and successful color escapades with ion liquid permanent hair color. It’s not just about changing hair; it’s about owning your unique journey.

Your story is waiting to be told. So, go ahead, grab that color, and let your own narrative unfold. Because in the world of ion liquid permanent hair color, every strand has a story

FAQ

Let’s tackle some common queries you might have about diving into the colorful world of ion liquid permanent hair color:

Q1: How do I choose the right shade for me?

A: Consider your skin tone, style preferences, and the ion color chart. The numbering system helps too – lower numbers for darker shades, higher for lighter ones.

Q2: Is patch testing really necessary?

A: Absolutely! Patch testing is a small but crucial step to ensure you won’t have any adverse reactions to the hair color. It’s a quick test that can save you from potential discomfort.

Q3: Can I apply ion liquid permanent hair color on wet hair?

A: No, it’s best to apply the color to dry hair for optimal results. Washing your hair a day or two before coloring is recommended.

Q4: How important is sectioning my hair during application?

A: Very! Sectioning ensures even color distribution and helps you cover every strand. It might take a bit longer, but the results are worth it.

Q5: How long should I leave the color on my hair?

A: Follow the recommended processing time mentioned in the instructions. It varies depending on the shade and desired intensity.

Q6: Can I use my own conditioner after rinsing the color?

A: While you can use your own conditioner, it’s advisable to use the one provided in the ion liquid permanent hair color kit or a color-safe conditioner for optimal results.

Q7: How often should I touch up the color?

A: The frequency depends on your hair growth and the desired vibrancy. On average, every 4-6 weeks is common for maintaining the color.

Q8: What if I experience uneven color after application?

A: Don’t panic! It happens. Gently comb through your hair during the application to ensure even distribution. If you notice uneven color post-rinse, consult the troubleshooting section in the instructions or seek professional advice.

Q9: Can I mix different shades of ion liquid permanent hair color?

A: While it’s generally recommended to stick to one shade for consistent results, you can experiment with blending shades if you’re feeling adventurous. Conduct a strand test to see the outcome beforehand.

Q10: Are there any safety precautions I should take?

A: Absolutely. Always wear the gloves provided in the kit, and apply a thin layer of petroleum jelly along your hairline and ears to prevent staining. Ensure good ventilation in your coloring space.

How to use ion liquid permanent hair color Read More »

Best jumpsuits for wedding

Introduction

Hey there, style enthusiasts! 👋🏼 Ever thought about ditching the traditional wedding dress and rocking a jumpsuit on your big day? Or maybe you’re attending a wedding and want to stand out with a killer jumpsuit look? Well, you’re in the right place!

In this blog, we’re throwing the rulebook out the window and diving into the fabulous world of wedding jumpsuits. Yep, you heard it right – jumpsuits! They’re not just for casual outings; these bad boys are making waves in the wedding scene, bringing a whole new level of chic and comfort to the game.

We’re on a mission to unravel the secrets of the best jumpsuits for weddings. Whether you’re the bride breaking free from tradition or a guest who wants to turn heads, we’ve got the lowdown on the hottest trends, styles that flatter every body type, and tips to slay the jumpsuit game at any wedding.

So buckle up and join us as we explore the glamorous side of jumpsuit fashion, spill the tea on where to snag these jaw-dropping outfits, and sprinkle in a bit of real-life wedding inspo. Ready to redefine elegance? Let’s do this!

Best jumpsuits for wedding

Hey fabulous readers! 👗✨ Today, we’re diving into the world of wedding jumpsuits, and I’ve scoured Amazon to find some stunners that might just steal the show. Whether you’re the bride looking to break away from tradition or a guest wanting to turn heads, these jumpsuits promise a perfect blend of style and comfort. Let’s take a closer look at our top picks!

1. BLENCOT High Waisted Jumpsuit

Best jumpsuits for wedding

Features:

High-waisted design for a flattering silhouette.

Fashion-forward and versatile, suitable for various occasions.

Comfy and breathable fabric.

Stylish romper detailing.

Available in a range of sizes.

Why We Love It:

Perfect balance of trendiness and sophistication.

Versatile enough to be dressed up or down for different wedding vibes.

Cons:

Some customers mentioned the need for careful sizing, so check the size chart!

2. BTFBM Off-Shoulder Jumpsuit

Best jumpsuits for wedding

Features:

Elegant off-shoulder design.

Flowy and comfortable for easy movement.

Versatile for both casual and formal events.

Pleated details for added charm.

Comes in various sizes and colors.

Why We Love It:

The off-shoulder style adds a touch of romance.

Ideal for those who want a relaxed yet polished look.

Cons:

A few buyers noted the need for careful ironing to maintain the pleats.

3. PRETTYGARDEN Women’s Jumpsuit with Pockets

Best jumpsuits for wedding

Features:

Convenient and stylish pockets.

Wide-leg design for a fashionable statement.

Adjustable spaghetti straps.

Backless detail for a touch of allure.

Made with comfortable, breathable fabric.

Why We Love It:

Pockets! Need we say more?

The wide-leg silhouette is both trendy and comfy.

Cons:

Some users reported the need for minor alterations for a perfect fit.

4. PRETTYGARDEN Women’s Fashion Jumpsuit

Best jumpsuits for wedding

Features:

Stylish and modern design.

Figure-flattering cinched waist.

Wide-legged trousers for a trendy look.

Available in various colors.

Soft and comfortable fabric for all-day wear.

Why We Love It:

Strikes the perfect balance between fashion-forward and comfortable.

Ideal for those looking for a contemporary twist on classic elegance.

Cons:

Some customers recommended checking sizing carefully, especially for the waist.

5. Happy Sailed Jumpsuit Overalls

Best jumpsuits for wedding

Features:

Casual yet chic overall jumpsuit style.

Adjustable spaghetti straps.

Wide-leg pants for a breezy feel.

Available in multiple colors.

Lightweight fabric, perfect for warm weather.

Why We Love It:

Effortlessly cool and laid-back style.

Versatile enough for both beach and indoor weddings.

Cons:

Some customers noted the need for proper adjustments to the straps for a comfortable fit.

6. PRETTYGARDEN Sleeveless Spaghetti Strap Backless Jumpsuit

Features:

Sleek and sophisticated sleeveless design.

Spaghetti straps for a delicate touch.

Chic backless detail.

Flowy wide-leg pants.

Comfortable and breathable fabric.

Why We Love It:

The epitome of modern elegance.

Perfect for those seeking a minimalist yet impactful look.

Cons:

A few users recommended considering proper undergarments due to the open back design.

7. LYANER Women’s Sleeveless Chiffon Jumpsuit

Features:

Elegant chiffon fabric for a light and airy feel.

Sleeveless design for a touch of sophistication.

Wide-leg pants for a graceful silhouette.

Adjustable spaghetti straps for a personalized fit.

Versatile for both casual and formal events.

Why We Love It:

Perfect for warm-weather weddings with its breezy chiffon fabric.

Effortlessly combines comfort with refined style.

Cons:

A few customers suggested paying attention to the length, especially for petite individuals.

8. IBTOM CASTLE Sleeveless Jumpsuits Clubwear

Features:

Chic sleeveless design with a V-neckline.

Wide-legged trousers for a trendy look.

Versatile for various occasions.

Comfortable and breathable fabric.

Stylish yet understated detailing.

Why We Love It:

A versatile piece that can be dressed up or down for different events.

Classic design with a modern twist.

Cons:

Some users advised checking the sizing chart carefully to ensure a proper fit.

9. DinyIn Burgundy Jumpsuit with Collared Neck

Features:

Unique collared neck for a sophisticated touch.

Pleated waist detailing for a tailored look.

Stylish burgundy color for a bold statement.

Comfortable and wrinkle-resistant fabric.

Suitable for various occasions, including vacations.

Why We Love It:

The collared neck adds a refined and polished element.

Burgundy is a standout choice for those wanting to make a statement.

Cons:

A few customers mentioned the need for minor adjustments for a perfect fit.

10. BTFBM Chiffon Jumpsuit with Elastic Waist and Pleated Bodice

Features:

Flowy chiffon fabric for an elegant look.

Elastic waist and pleated bodice for a flattering fit.

Sleeveless design for a classic touch.

Versatile for weddings, parties, and more.

Available in various colors.

Why We Love It:

The combination of a flattering silhouette and breezy chiffon is a win-win.

Suitable for a range of events beyond weddings.

Cons:

Some customers suggested checking the sizing, particularly for the elastic waist.

Style Guide: Picking the Perfect Jumpsuit for Your Wedding Look

Hey, trendsetter! So, you’ve decided to flip the script and go for a jumpsuit instead of the typical wedding gown – major kudos! Now, let’s chat about how to rock that jumpsuit like the style icon you are. Here’s your go-to style guide for finding the jumpsuit that screams “you”:

1. Necklines and Sleeves:

V-Neck Vibes: Picture this – a V-neckline that adds a dash of glam and makes you look taller. Elegant, right?

Off-Shoulder Sizzle: Show off those shoulders with an off-shoulder jumpsuit – it’s all about the romance and a bit of flirtiness.

Sleeveless Swagger: When in doubt, go sleeveless. Classic, chic, and lets you play around with accessories.

2. Silhouettes and Cuts:

High-Waisted Hottie: Snatch that waist! A high-waisted jumpsuit is all about flaunting those curves and looking effortlessly glam.

Wide-Leg Wonderland: Swap out the traditional skirt for wide-legged trousers – comfy, stylish, and perfect for busting out some killer dance moves.

Tailored Perfection: A jumpsuit with a cinched waist is like the power suit of weddings – polished, put-together, and ready to slay.

3. Fabrics for Every Season:

Chiffon Dream: Think light and airy for spring or summer weddings. Chiffon is your go-to for that goddess-like vibe.

Velvet Luxe: Hello, winter wonderland! Velvet is the way to go if you’re aiming for a luxe, cozy feel.

Lace Lovin’: Lace detailing adds that touch of romance and texture – perfect for any season.

4. Color Palette:

Classic in White: Keep it classic and bridal with a white jumpsuit. Timeless, beautiful, and a canvas for killer accessories.

Pastel Princess: Soft hues like blush or champagne add a subtle touch of color without straying too far from tradition.

Bold and Beautiful: Feeling daring? Go for a bold color like burgundy, navy, or emerald to turn heads.

5. Accessories:

Bling it On: Statement earrings, a bold necklace, or a dazzling bracelet – bring on the bling to elevate your jumpsuit game.

Cinch it Right: A cute belt can define that waist and add a hint of glamour. Practical and stylish? Yes, please.

Veil or Cape Drama: Traditional with a twist! Consider a veil or a cape for that extra touch of drama and flair.

FAQs: The Best Jumpsuits for Weddings

Q1: Why choose a jumpsuit over a traditional wedding dress?

Because jumpsuits bring a perfect blend of style and comfort. They offer a modern, chic alternative for brides who want to break away from tradition while still looking stunning on their big day.

Q2: Are jumpsuits suitable for all body types?

Absolutely! Jumpsuits come in various styles and cuts, making them versatile for different body shapes. Whether you’re curvy, petite, or somewhere in between, there’s a jumpsuit that will flatter your figure.

Q3: Can jumpsuits be as formal as traditional wedding gowns?

Absolutely. Jumpsuits come in a range of designs, from sleek and sophisticated to intricate and embellished. You can find jumpsuits that are just as formal and glamorous as traditional gowns, if not more.

Q4: What accessories pair well with wedding jumpsuits?

Jumpsuits are incredibly versatile when it comes to accessories. Consider statement earrings, a chic belt, or even a stylish veil or cape for that extra touch of drama. The key is to accessorize based on the style of the jumpsuit.

Q5: Can jumpsuits be worn for different wedding themes?

Yes! Whether it’s a beach wedding, a formal ballroom affair, or an intimate garden ceremony, there’s a jumpsuit to match every wedding theme. From casual elegance to black-tie sophistication, jumpsuits can be tailored to suit any setting.

Q6: How do I ensure the jumpsuit is the right fit?

Be sure to check the sizing chart provided by the brand. Additionally, consider any alterations that might be needed, especially for jumpsuits with unique features like wide-leg pants or tailored fits.

Q7: Are jumpsuits budget-friendly?

Absolutely! Jumpsuits come in a wide price range, making them accessible for various budgets. There are stylish options available at both high-end boutiques and more affordable retailers.

Q8: Can jumpsuits be worn for other wedding events, like the rehearsal dinner or engagement party?

Certainly! Jumpsuits are not limited to the wedding day itself. They make fantastic choices for rehearsal dinners, engagement parties, or any pre-wedding events where you want to make a fashionable statement.

Q9: Can bridesmaids wear jumpsuits?

Absolutely. Jumpsuits can be a stylish and cohesive choice for bridesmaid attire. Choosing a uniform color or allowing each bridesmaid to pick a jumpsuit that suits their style can create a unique and cohesive look.

Q10: How do I care for a wedding jumpsuit?

Check the care instructions on the garment, but generally, most jumpsuits can be hand-washed or dry-cleaned. Be mindful of any delicate details or fabrics, and store it properly to prevent wrinkles.

Best jumpsuits for wedding Read More »

Index
Scroll to Top